Showing posts with label GTK#. Show all posts

Step By Step GTK# tutorial

GTK# tutorial

This is GTK# tutorial for the C# programming language. This tutorial is suitable for beginners and more advanced programmers.

Table of contents

GTK#

GTK# is a wrapper over the GTK+ for the C# programming language. The library facilitates building graphical GNOME applications using Mono or any other compliant CLR. Applications built using Gtk# will run on many platforms including Linux, Microsoft Windows and Mac OS X. GTK# is part of the Mono initiative.
Continue Reading

Custom widget in GTK#

Custom widget in GTK#

Have you ever looked at an application and wondered, how a particular gui item was created? Probably every wannabe programmer has. Then you were looking at a list of widgets provided by your favourite gui library. But you couldn't find it. Toolkits usually provide only the most common widgets like buttons, text widgets, sliders etc. No toolkit can provide all possible widgets.
There are actually two kinds of toolkits. Spartan toolkits and heavy weight toolkits. The FLTK toolkit is a kind of a spartan toolkit. It provides only the very basic widgets and assumes, that the programemer will create the more complicated ones himself. wxWidgets is a heavy weight one. It has lots of widgets. Yet it does not provide the more specialized widgets. For example a speed meter widget, a widget that measures the capacity of a CD to be burned (found e.g. in nero). Toolkits also don't have usually charts.
Programmers must create such widgets by themselves. They do it by using the drawing tools provided by the toolkit. There are two possibilities. A programmer can modify or enhance an existing widget. Or he can create a custom widget from scratch.

Burning widget

This is an example of a widget, that we create from scratch. This widget can be found in various media burning applications, like Nero Burning ROM.
burning.cs
using Gtk;
using Cairo;
using System;

class Burning : DrawingArea
{

string[] num = new string[] { "75", "150", "225", "300",
"375", "450", "525", "600", "675" };

public Burning() : base()
{
SetSizeRequest(-1, 30);
}

protected override bool OnExposeEvent(Gdk.EventExpose args)
{

Cairo.Context cr = Gdk.CairoHelper.Create(args.Window);
cr.LineWidth = 0.8;

cr.SelectFontFace("Courier 10 Pitch",
FontSlant.Normal, FontWeight.Normal);
cr.SetFontSize(11);

int width = Allocation.Width;

SharpApp parent = (SharpApp) GetAncestor (Gtk.Window.GType);
int cur_width = parent.CurValue;

int step = (int) Math.Round(width / 10.0);

int till = (int) ((width / 750.0) * cur_width);
int full = (int) ((width / 750.0) * 700);

if (cur_width >= 700) {

cr.SetSourceRGB(1.0, 1.0, 0.72);
cr.Rectangle(0, 0, full, 30);
cr.Clip();
cr.Paint();
cr.ResetClip();

cr.SetSourceRGB(1.0, 0.68, 0.68);
cr.Rectangle(full, 0, till-full, 30);
cr.Clip();
cr.Paint();
cr.ResetClip();

} else {

cr.SetSourceRGB(1.0, 1.0, 0.72);
cr.Rectangle(0, 0, till, 30);
cr.Clip();
cr.Paint();
cr.ResetClip();
}

cr.SetSourceRGB(0.35, 0.31, 0.24);

for (int i=1; i<=num.Length; i++) {

cr.MoveTo(i*step, 0);
cr.LineTo(i*step, 5);
cr.Stroke();

TextExtents extents = cr.TextExtents(num[i-1]);
cr.MoveTo(i*step-extents.Width/2, 15);
cr.TextPath(num[i-1]);
cr.Stroke();
}

((IDisposable) cr.Target).Dispose();
((IDisposable) cr).Dispose();

return true;
}
}


class SharpApp : Window {

int cur_value = 0;
Burning burning;

public SharpApp() : base("Burning")
{
SetDefaultSize(350, 200);
SetPosition(WindowPosition.Center);
DeleteEvent += delegate { Application.Quit(); };

VBox vbox = new VBox(false, 2);

HScale scale = new HScale(0, 750, 1);
scale.SetSizeRequest(160, 35);
scale.ValueChanged += OnChanged;

Fixed fix = new Fixed();
fix.Put(scale, 50, 50);

vbox.PackStart(fix);

burning = new Burning();
vbox.PackStart(burning, false, false, 0);

Add(vbox);

ShowAll();
}

void OnChanged(object sender, EventArgs args)
{
Scale scale = (Scale) sender;
cur_value = (int) scale.Value;
burning.QueueDraw();
}

public int CurValue {
get { return cur_value; }
}


public static void Main()
{
Application.Init();
new SharpApp();
Application.Run();
}
}
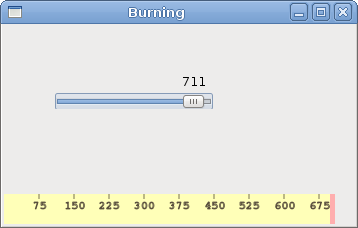
We put a DrawingArea on the bottom of the window and draw the entire widget manually. All the important code resides in the OnExposeEvent() method of the Burning class. This widget shows graphically the total capacity of a medium and the free space available to us. The widget is controlled by a scale widget. The minimum value of our custom widget is 0, the maximum is 750. If we reach value 700, we began drawing in red colour. This normally indicates overburning.
string[] num = new string[] { "75", "150", "225", "300", 
"375", "450", "525", "600", "675" };
These numbers are shown on the burning widget. They show the capacity of the medium.
SharpApp parent = (SharpApp) GetAncestor (Gtk.Window.GType);        
int cur_width = parent.CurValue;
These two lines get the current number from the scale widget. We get the parent widget and from the parent widget, we get the current value.
int till = (int) ((width / 750.0) * cur_width);
int full = (int) ((width / 750.0) * 700);
The till parameter determines the total size to be drawn. This value comes from the slider widget. It is a proportion of the whole area. The full parameter determines the point, where we begin to draw in red color.
cr.SetSourceRGB(1.0, 1.0, 0.72);
cr.Rectangle(0, 0, full, 30);
cr.Clip();
cr.Paint();
cr.ResetClip();
This code here, draws a yellow rectangle up to point, where the medium is full.
TextExtents extents = cr.TextExtents(num[i-1]);
cr.MoveTo(i*step-extents.Width/2, 15);
cr.TextPath(num[i-1]);
cr.Stroke();
This code here draws the numbers on the burning widget. We calculate the TextExtents to position the text correctly.
void OnChanged(object sender, EventArgs args)
{
Scale scale = (Scale) sender;
cur_value = (int) scale.Value;
burning.QueueDraw();
}
We get the value from the scale widget, store it in the cur_value variable for later use. We redraw the burning widget.
Burning widget
Figure: Burning widget
In this chapter, we created a custom widget in GTK#.
Continue Reading

Drawing with Cairo library in GTK#

Drawing with Cairo library in GTK#

In this part of the GTK# programming tutorial, we will continue drawing with the Cairo library.

Donut

In the following example we create an complex shape by rotating a bunch of ellipses.
donut.cs
using Gtk;
using Cairo;
using System;

class SharpApp : Window {


public SharpApp() : base("Donut")
{
SetDefaultSize(350, 250);
SetPosition(WindowPosition.Center);
DeleteEvent += delegate { Application.Quit(); };

DrawingArea darea = new DrawingArea();
darea.ExposeEvent += OnExpose;

Add(darea);

ShowAll();
}

void OnExpose(object sender, ExposeEventArgs args)
{
DrawingArea area = (DrawingArea) sender;
Cairo.Context cr = Gdk.CairoHelper.Create(area.GdkWindow);

cr.LineWidth = 0.5;

int width, height;
width = Allocation.Width;
height = Allocation.Height;

cr.Translate(width/2, height/2);
cr.Arc(0, 0, 120, 0, 2*Math.PI);
cr.Stroke();

cr.Save();

for (int i = 0; i < 36; i++) {
cr.Rotate( i*Math.PI/36);
cr.Scale(0.3, 1);
cr.Arc(0, 0, 120, 0, 2*Math.PI);
cr.Restore();
cr.Stroke();
cr.Save();
}

((IDisposable) cr.Target).Dispose();
((IDisposable) cr).Dispose();
}


public static void Main()
{
Application.Init();
new SharpApp();
Application.Run();
}
}
In this example, we create a donut. The shapes resembles a cookie, hence the name donut.
cr.Translate(width/2, height/2);
cr.Arc(0, 0, 120, 0, 2*Math.PI);
cr.Stroke();
In the beginning there is an ellipse.
for (int i = 0; i < 36; i++) {
cr.Rotate( i*Math.PI/36);
cr.Scale(0.3, 1);
cr.Arc(0, 0, 120, 0, 2*Math.PI);
cr.Restore();
cr.Stroke();
cr.Save();
}
After several rotations, there is a donut.
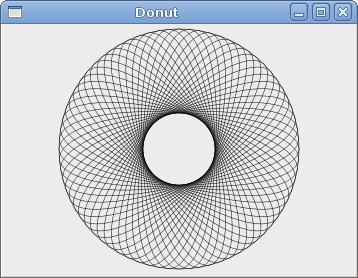
Donut
Figure: Donut

Gradients

In computer graphics, gradient is a smooth blending of shades from light to dark or from one color to another. In 2D drawing programs and paint programs, gradients are used to create colorful backgrounds and special effects as well as to simulate lights and shadows. (answers.com)
gradients.cs
using Gtk;
using Cairo;
using System;

class SharpApp : Window {


public SharpApp() : base("Gradients")
{
SetDefaultSize(340, 390);
SetPosition(WindowPosition.Center);
DeleteEvent += delegate { Application.Quit(); };

DrawingArea darea = new DrawingArea();
darea.ExposeEvent += OnExpose;

Add(darea);

ShowAll();
}

void OnExpose(object sender, ExposeEventArgs args)
{
DrawingArea area = (DrawingArea) sender;
Cairo.Context cr = Gdk.CairoHelper.Create(area.GdkWindow);


LinearGradient lg1 = new LinearGradient(0.0, 0.0, 350.0, 350.0);

int count = 1;

for (double j=0.1; j<1.0; j+= 0.1) {
if (Convert.ToBoolean(count % 2)) {
lg1.AddColorStop(j, new Color(0, 0, 0, 1));
} else {
lg1.AddColorStop(j, new Color(1, 0, 0, 1));
}
count++;
}

cr.Rectangle(20, 20, 300, 100);
cr.Pattern = lg1;
cr.Fill();

LinearGradient lg2 = new LinearGradient(0.0, 0.0, 350.0, 0);

count = 1;

for (double i=0.05; i<0.95; i+= 0.025) {
if (Convert.ToBoolean(count % 2)) {
lg2.AddColorStop(i, new Color(0, 0, 0, 1));
} else {
lg2.AddColorStop(i, new Color(0, 0, 1, 1));
}
count++;
}

cr.Rectangle(20, 140, 300, 100);
cr.Pattern = lg2;
cr.Fill();

LinearGradient lg3 = new LinearGradient(20.0, 260.0, 20.0, 360.0);
lg3.AddColorStop(0.1, new Color (0, 0, 0, 1) );
lg3.AddColorStop(0.5, new Color (1, 1, 0, 1) );
lg3.AddColorStop(0.9, new Color (0, 0, 0, 1) );

cr.Rectangle(20, 260, 300, 100);
cr.Pattern = lg3;
cr.Fill();


lg1.Destroy();
lg2.Destroy();
lg3.Destroy();

((IDisposable) cr.Target).Dispose ();
((IDisposable) cr).Dispose ();
}

public static void Main()
{
Application.Init();
new SharpApp();
Application.Run();
}
}
In our example, we draw three rectangles with three different gradients.
LinearGradient lg1 = new LinearGradient(0.0, 0.0, 350.0, 350.0);
Here we create a linear gradient pattern. The parameters specify the line, along which we draw the gradient. In our case it is a vertical line.
 
LinearGradient lg3 = new LinearGradient(20.0, 260.0, 20.0, 360.0);
lg3.AddColorStop(0.1, new Color (0, 0, 0, 1) );
lg3.AddColorStop(0.5, new Color (1, 1, 0, 1) );
lg3.AddColorStop(0.9, new Color (0, 0, 0, 1) );
We define color stops to produce our gradient pattern. In this case, the gradient is a blending of black and yellow colors. By adding two black and one yellow stops, we create a horizontal gradient pattern. What do these stops actually mean? In our case, we begin with black color, which will stop at 1/10 of the size. Then we begin to gradually paint in yellow, which will culminate at the centre of the shape. The yellow color stops at 9/10 of the size, where we begin painting in black again, until the end.
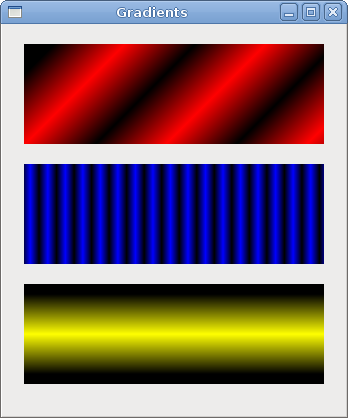
Gradients
Figure: Gradients

Puff

In the following example, we create a puff effect. The example will display a growing centered text, that will gradully fade out from some point. This is a very common effect, which you can often see in flash animations.
puff.cs
using Gtk;
using Cairo;
using System;

class SharpApp : Window {


private bool timer = true;
private double alpha = 1.0;
private double size = 1.0;
private DrawingArea darea;


public SharpApp() : base("Puff")
{
SetDefaultSize(350, 200);
SetPosition(WindowPosition.Center);
DeleteEvent += delegate { Application.Quit(); };

GLib.Timeout.Add(14, new GLib.TimeoutHandler(OnTimer));

darea = new DrawingArea();
darea.ExposeEvent += OnExpose;

Add(darea);

ShowAll();
}

bool OnTimer()
{
if (!timer) return false;

darea.QueueDraw();
return true;
}

void OnExpose(object sender, ExposeEventArgs args)
{
DrawingArea area = (DrawingArea) sender;
Cairo.Context cr = Gdk.CairoHelper.Create(area.GdkWindow);

int x = Allocation.Width / 2;
int y = Allocation.Height / 2;

cr.SetSourceRGB(0.5, 0, 0);
cr.Paint();

cr.SelectFontFace("Courier", FontSlant.Normal, FontWeight.Bold);

size += 0.8;

if (size > 20) {
alpha -= 0.01;
}

cr.SetFontSize(size);
cr.SetSourceRGB(1, 1, 1);

TextExtents extents = cr.TextExtents("ZetCode");

cr.MoveTo(x - extents.Width/2, y);
cr.TextPath("ZetCode");
cr.Clip();
cr.Stroke();
cr.PaintWithAlpha(alpha);

if (alpha <= 0) {
timer = false;
}

((IDisposable) cr.Target).Dispose();
((IDisposable) cr).Dispose();
}


public static void Main()
{
Application.Init();
new SharpApp();
Application.Run();
}
}
The example creates a growing and fading text on the window.
GLib.Timeout.Add(14, new GLib.TimeoutHandler(OnTimer));
Every 14 ms the OnTimer() method is called.
bool OnTimer() 
{
if (!timer) return false;

darea.QueueDraw();
return true;
}
In the OnTimer() method, we call the QueueDraw() method upon the drawing area, which triggers the ExposeEvent.
int x = Allocation.Width / 2;
int y = Allocation.Height / 2;
Coordinates of the middle point.
cr.SetSourceRGB(0.5, 0, 0);
cr.Paint();
We set the background color to dark red color.
size += 0.8;
Each cycle, the font size will grow by 0.8 units.
if (size > 20) {
alpha -= 0.01;
}
The fading out begins after the font size is bigger than 20.
TextExtents extents = cr.TextExtents("ZetCode");
We get the text metrics.
cr.MoveTo(x - extents.Width/2, y);
We use the text metrics to center the text on the window.
cr.TextPath("ZetCode");
cr.Clip();
We get the path of the text and set the current clip region to it.
cr.Stroke();
cr.PaintWithAlpha(alpha);
We paint the current path and take alpha value into account.
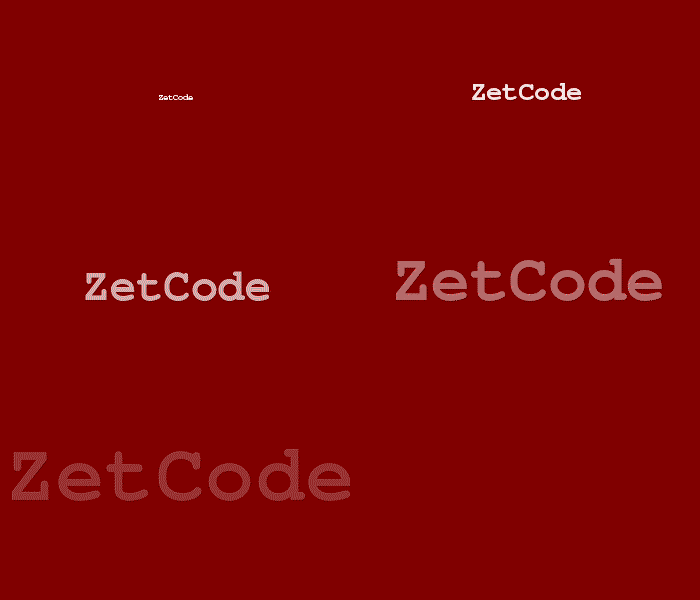
Puff
Figure: Puff

Reflection

In the next example we show a reflected image. This beautiful effect makes an illusion as if the image was reflected in water.
reflection.cs
using Gtk;
using Cairo;
using System;

class SharpApp : Window {

private ImageSurface surface;
private int imageWidth;
private int imageHeight;
private int gap;
private int border;

public SharpApp() : base("Reflection")
{

try {
surface = new ImageSurface("slanec.png");
} catch {
Console.WriteLine("File not found");
Environment.Exit(1);
}

imageWidth = surface.Width;
imageHeight = surface.Height;
gap = 40;
border = 20;

SetDefaultSize(300, 350);
SetPosition(WindowPosition.Center);
DeleteEvent += delegate { Application.Quit(); };

DrawingArea darea = new DrawingArea();
darea.ExposeEvent += OnExpose;

Add(darea);

ShowAll();
}

void OnExpose(object sender, ExposeEventArgs args)
{
DrawingArea area = (DrawingArea) sender;
Cairo.Context cr = Gdk.CairoHelper.Create(area.GdkWindow);

int width = Allocation.Width;
int height = Allocation.Height;

LinearGradient lg = new LinearGradient(width/2, 0, width/2, height*3);
lg.AddColorStop(0, new Color(0, 0, 0, 1));
lg.AddColorStop(height, new Color(0.2, 0.2, 0.2, 1));

cr.Pattern = lg;
cr.Paint();

cr.SetSourceSurface(surface, border, border);
cr.Paint();

double alpha = 0.7;
double step = 1.0 / imageHeight;

cr.Translate(0, 2 * imageHeight + gap);
cr.Scale(1, -1);

int i = 0;


while(i < imageHeight) {
cr.Rectangle(new Rectangle(border, imageHeight-i, imageWidth, 1));

i++;

cr.Clip();
cr.SetSource(surface, border, border);

cr.PaintWithAlpha(alpha-=step);
cr.ResetClip();
}


((IDisposable) cr.Target).Dispose();
((IDisposable) cr).Dispose();
}

public static void Main()
{
Application.Init();
new SharpApp();
Application.Run();
}
}
The example shows a reflected castle.
LinearGradient lg = new LinearGradient(width/2, 0, width/2, height*3);
lg.AddColorStop(0, new Color(0, 0, 0, 1));
lg.AddColorStop(height, new Color(0.2, 0.2, 0.2, 1));

cr.Pattern = lg;
cr.Paint();
The background is filled with a gradiet paint. The paint is a smooth blending from black to dark gray.
cr.Translate(0, 2 * imageHeight + gap);
cr.Scale(1, -1);
This code flips the image and translates it below the original image. The translation operation is necessary, because the scaling operation makes the image upside down and translates the image up. To understand what happens, simply take a photograph and place it on the table. Now flip it.
cr.Rectangle(new Rectangle(border, imageHeight-i, imageWidth, 1));

i++;

cr.Clip();
cr.SetSource(surface, border, border);

cr.PaintWithAlpha(alpha-=step);
cr.ResetClip();
Crucial part of the code. We make the second image transparent. But the transparency is not constant. The image gradually fades out. This is achieved with the GradientPaint.
Reflection
Figure: Reflection

Waiting

In this examle, we use transparency effect to create a waiting demo. We will draw 8 lines that will gradually fade out creating an illusion, that a line is moving. Such effects are often used to inform users, that a lengthy task is going on behind the scenes. An example is streaming video over the internet.
waiting.cs
using Gtk;
using Cairo;
using System;

class SharpApp : Window {


private double [,] trs = new double[,] {
{ 0.0, 0.15, 0.30, 0.5, 0.65, 0.80, 0.9, 1.0 },
{ 1.0, 0.0, 0.15, 0.30, 0.5, 0.65, 0.8, 0.9 },
{ 0.9, 1.0, 0.0, 0.15, 0.3, 0.5, 0.65, 0.8 },
{ 0.8, 0.9, 1.0, 0.0, 0.15, 0.3, 0.5, 0.65},
{ 0.65, 0.8, 0.9, 1.0, 0.0, 0.15, 0.3, 0.5 },
{ 0.5, 0.65, 0.8, 0.9, 1.0, 0.0, 0.15, 0.3 },
{ 0.3, 0.5, 0.65, 0.8, 0.9, 1.0, 0.0, 0.15 },
{ 0.15, 0.3, 0.5, 0.65, 0.8, 0.9, 1.0, 0.0, }
};

private short count = 0;
private DrawingArea darea;

public SharpApp() : base("Waiting")
{
SetDefaultSize(250, 150);
SetPosition(WindowPosition.Center);
DeleteEvent += delegate { Application.Quit(); };

GLib.Timeout.Add(100, new GLib.TimeoutHandler(OnTimer));

darea = new DrawingArea();
darea.ExposeEvent += OnExpose;

Add(darea);

ShowAll();
}

bool OnTimer()
{
count += 1;
darea.QueueDraw();
return true;
}


void OnExpose(object sender, ExposeEventArgs args)
{
DrawingArea area = (DrawingArea) sender;
Cairo.Context cr = Gdk.CairoHelper.Create(area.GdkWindow);

cr.LineWidth = 3;
cr.LineCap = LineCap.Round;

int width, height;
width = Allocation.Width;
height = Allocation.Height;

cr.Translate(width/2, height/2);

for (int i = 0; i < 8; i++) {
cr.SetSourceRGBA(0, 0, 0, trs[count%8, i]);
cr.MoveTo(0.0, -10.0);
cr.LineTo(0.0, -40.0);
cr.Rotate(Math.PI/4);
cr.Stroke();
}

((IDisposable) cr.Target).Dispose();
((IDisposable) cr).Dispose();
}

public static void Main()
{
Application.Init();
new SharpApp();
Application.Run();
}
}
We draw eight lines with eight different alpha values.
GLib.Timeout.Add(100, new GLib.TimeoutHandler(OnTimer));
We use a timer function to create animation.
private double [,] trs = new double[,] {
{ 0.0, 0.15, 0.30, 0.5, 0.65, 0.80, 0.9, 1.0 },
...
};
This is a two dimensional array of transparency values used in this demo. There are 8 rows, each for one state. Each of the 8 lines will continuosly use these values.
cr.LineWidth = 3;
cr.LineCap = LineCap.Round;
We make the lines a bit thicker, so that they are better visible. We draw the lines with rouded caps.
cr.SetSourceRGBA(0, 0, 0, trs[count%8, i]);
Here we define the transparency value for a line.
cr.MoveTo(0.0, -10.0);
cr.LineTo(0.0, -40.0);
cr.Rotate(Math.PI/4);
cr.Stroke();
These code lines will draw each of the eight lines.
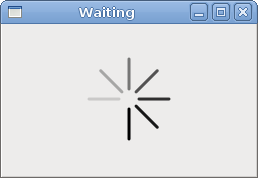
Waiting
Figure: Waiting
In this chapter of the GTK# programming library, we did some more advanced drawing with the Cairo library.
Continue Reading

Drawing with Cairo in GTK#

Drawing with Cairo

In this part of the GTK# programming tutorial, we will do some drawing with the Cairo library.
Cairo is a library for creating 2D vector graphics. We can use it to draw our own widgets, charts or various effects or animations.

Simple drawing

The stroke operation draws the outlines of shapes and the fill operation fills the insides of shapes. Next we will demonstrate these two operations.
simpledrawing.cs
using Gtk;
using Cairo;
using System;

class SharpApp : Window {


public SharpApp() : base("Simple drawing")
{
SetDefaultSize(230, 150);
SetPosition(WindowPosition.Center);
DeleteEvent += delegate { Application.Quit(); };;

DrawingArea darea = new DrawingArea();
darea.ExposeEvent += OnExpose;

Add(darea);

ShowAll();
}

void OnExpose(object sender, ExposeEventArgs args)
{
DrawingArea area = (DrawingArea) sender;
Cairo.Context cr = Gdk.CairoHelper.Create(area.GdkWindow);

cr.LineWidth = 9;
cr.SetSourceRGB(0.7, 0.2, 0.0);

int width, height;
width = Allocation.Width;
height = Allocation.Height;

cr.Translate(width/2, height/2);
cr.Arc(0, 0, (width < height ? width : height) / 2 - 10, 0, 2*Math.PI);
cr.StrokePreserve();

cr.SetSourceRGB(0.3, 0.4, 0.6);
cr.Fill();

((IDisposable) cr.Target).Dispose();
((IDisposable) cr).Dispose();
}

public static void Main()
{
Application.Init();
new SharpApp();
Application.Run();
}
}
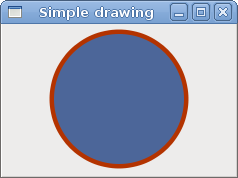
In our example, we will draw a circle and will it with a solid color.
gmcs -pkg:gtk-sharp-2.0 -r:/usr/lib/mono/2.0/Mono.Cairo.dll  simple.cs
Here is how we compile the example.
DrawingArea darea = new DrawingArea();
We will be doing our drawing operations on the DrawingArea widget.
darea.ExposeEvent += OnExpose;
All drawing is done in a method, that we plug into the ExposeEvent.
DrawingArea area = (DrawingArea) sender;
Cairo.Context cr = Gdk.CairoHelper.Create(area.GdkWindow);
We create the Cairo.Context object from the GdkWindow of the drawing area. The context is an object that is used to draw on all Drawable objects.
cr.LineWidth = 9;
We set the width of the line to 9 pixels.
cr.SetSourceRGB(0.7, 0.2, 0.0);
We set the color to dark red.
int width, height;
width = Allocation.Width;
height = Allocation.Height;

cr.Translate(width/2, height/2);
We get the width and height of the drawing area. We move the origin into the middle of the window.
cr.Arc(0, 0, (width < height ? width : height) / 2 - 10, 0, 2*Math.PI);
cr.StrokePreserve();
We draw the outside shape of a circle. The StrokePreserve() strokes the current path according to the current line width, line join, line cap, and dash settings. Unlike the Stroke(), it preserves the path within the cairo context.
cr.SetSourceRGB(0.3, 0.4, 0.6);
cr.Fill();
This fills the interior of the circle with some blue color.
Simple drawing
Figure: Simple drawing

Basic shapes

The next example draws some basic shapes onto the window.
basicshapes.cs
using Gtk;
using Cairo;
using System;

class SharpApp : Window {


public SharpApp() : base("Basic shapes")
{
SetDefaultSize(390, 240);
SetPosition(WindowPosition.Center);
DeleteEvent += delegate { Application.Quit(); };

DrawingArea darea = new DrawingArea();
darea.ExposeEvent += OnExpose;

Add(darea);
ShowAll();
}

void OnExpose(object sender, ExposeEventArgs args)
{
DrawingArea area = (DrawingArea) sender;
Cairo.Context cc = Gdk.CairoHelper.Create(area.GdkWindow);

cc.SetSourceRGB(0.2, 0.23, 0.9);
cc.LineWidth = 1;

cc.Rectangle(20, 20, 120, 80);
cc.Rectangle(180, 20, 80, 80);
cc.StrokePreserve();
cc.SetSourceRGB(1, 1, 1);
cc.Fill();

cc.SetSourceRGB(0.2, 0.23, 0.9);
cc.Arc(330, 60, 40, 0, 2*Math.PI);
cc.StrokePreserve();
cc.SetSourceRGB(1, 1, 1);
cc.Fill();

cc.SetSourceRGB(0.2, 0.23, 0.9);
cc.Arc(90, 160, 40, Math.PI/4, Math.PI);
cc.ClosePath();
cc.StrokePreserve();
cc.SetSourceRGB(1, 1, 1);
cc.Fill();

cc.SetSourceRGB(0.2, 0.23, 0.9);
cc.Translate(220, 180);
cc.Scale(1, 0.7);
cc.Arc(0, 0, 50, 0, 2*Math.PI);
cc.StrokePreserve();
cc.SetSourceRGB(1, 1, 1);
cc.Fill();

((IDisposable) cc.Target).Dispose ();
((IDisposable) cc).Dispose ();
}

public static void Main()
{
Application.Init();
new SharpApp();
Application.Run();
}
}
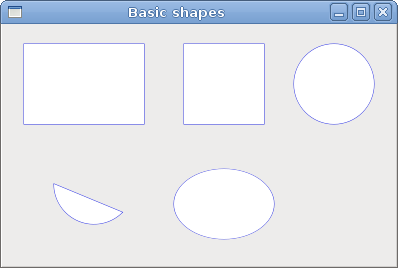
In this example, we will create a rectangle, a square, a circle, an arc and an ellipse. We draw outlines in blue color, insides in white.
cc.Rectangle(20, 20, 120, 80);
cc.Rectangle(180, 20, 80, 80);
cc.StrokePreserve();
cc.SetSourceRGB(1, 1, 1);
cc.Fill();
These lines draw a rectangle and a square.
cc.Arc(330, 60, 40, 0, 2*Math.PI);
Here the Arc() method draws a full circle.
cc.Scale(1, 0.7);        
cc.Arc(0, 0, 50, 0, 2*Math.PI);
If we want to draw an oval, we do some scaling first. Here the Scale() method shrinks the y axis.
Basic shapes
Figure: Basic shapes

Colors

A color is an object representing a combination of Red, Green, and Blue (RGB) intensity values. Cairo valid RGB values are in the range 0 to 1.
colors.cs
using Gtk;
using Cairo;
using System;

class SharpApp : Window {


public SharpApp() : base("Colors")
{
SetDefaultSize(360, 100);
SetPosition(WindowPosition.Center);
DeleteEvent += delegate { Application.Quit(); };

DrawingArea darea = new DrawingArea();
darea.ExposeEvent += OnExpose;

Add(darea);

ShowAll();
}

void OnExpose(object sender, ExposeEventArgs args)
{
DrawingArea area = (DrawingArea) sender;
Cairo.Context cr = Gdk.CairoHelper.Create(area.GdkWindow);

cr.SetSourceRGB(0.2, 0.23, 0.9);
cr.Rectangle(10, 15, 90, 60);
cr.Fill();

cr.SetSourceRGB(0.9, 0.1, 0.1);
cr.Rectangle(130, 15, 90, 60);
cr.Fill();

cr.SetSourceRGB(0.4, 0.9, 0.4);
cr.Rectangle(250, 15, 90, 60);
cr.Fill();

((IDisposable) cr.Target).Dispose();
((IDisposable) cr).Dispose();
}

public static void Main()
{
Application.Init();
new SharpApp();
Application.Run();
}
}
We draw three rectangles in three different colors. .
cr.SetSourceRGB(0.2, 0.23, 0.9);
The SetSourceRGB() method sets a color for the cairo context. The three parameters of the method are the color intensity values.
cr.Rectangle(10, 15, 90, 60);
cr.Fill();
We create a rectangle shape and fill it with the previously specified color.
Colors
Figure: Colors

Transparent rectangles

Transparency is the quality of being able to see through a material. The easiest way to understand transparency is to imagine a piece of glass or water. Technically, the rays of light can go through the glass and this way we can see objects behind the glass.
In computer graphics, we can achieve transparency effects using alpha compositing. Alpha compositing is the process of combining an image with a background to create the appearance of partial transparency. The composition process uses an alpha channel. (wikipedia.org, answers.com)
transparentrectangles.cs
using Gtk;
using Cairo;
using System;


class SharpApp : Window {


public SharpApp() : base("Transparent rectangles")
{
SetDefaultSize(590, 90);
SetPosition(WindowPosition.Center);
DeleteEvent += delegate { Application.Quit(); } ;

DrawingArea darea = new DrawingArea();
darea.ExposeEvent += OnExpose;

Add(darea);

ShowAll();
}

void OnExpose(object sender, ExposeEventArgs args)
{
DrawingArea area = (DrawingArea) sender;
Cairo.Context cr = Gdk.CairoHelper.Create(area.GdkWindow);

for ( int i = 1; i <= 10; i++) {
cr.SetSourceRGBA(0, 0, 1, i*0.1);
cr.Rectangle(50*i, 20, 40, 40);
cr.Fill();
}

((IDisposable) cr.Target).Dispose();
((IDisposable) cr).Dispose();
}

public static void Main()
{
Application.Init();
new SharpApp();
Application.Run();
}
}
In the example we will draw ten rectangles with different levels of transparency.
cr.SetSourceRGBA(0, 0, 1, i*0.1);
The last parameter of the SetSourceRGBA() method is the alpha transparency.
Transparent rectangles
Figure: Transparent rectangles

Soulmate

In the next example, we draw some text on the window.
soulmate.cs
using Gtk;
using Cairo;
using System;

class SharpApp : Window {


public SharpApp() : base("Soulmate")
{
SetDefaultSize(420, 250);
SetPosition(WindowPosition.Center);
DeleteEvent += delegate { Application.Quit(); };

DrawingArea darea = new DrawingArea();
darea.ExposeEvent += OnExpose;

Add(darea);

ShowAll();
}

void OnExpose(object sender, ExposeEventArgs args)
{
DrawingArea area = (DrawingArea) sender;
Cairo.Context cr = Gdk.CairoHelper.Create(area.GdkWindow);

cr.SetSourceRGB(0.1, 0.1, 0.1);

cr.SelectFontFace("Purisa", FontSlant.Normal, FontWeight.Bold);
cr.SetFontSize(13);

cr.MoveTo(20, 30);
cr.ShowText("Most relationships seem so transitory");
cr.MoveTo(20, 60);
cr.ShowText("They're all good but not the permanent one");
cr.MoveTo(20, 120);
cr.ShowText("Who doesn't long for someone to hold");
cr.MoveTo(20, 150);
cr.ShowText("Who knows how to love without being told");
cr.MoveTo(20, 180);
cr.ShowText("Somebody tell me why I'm on my own");
cr.MoveTo(20, 210);
cr.ShowText("If there's a soulmate for everyone");

((IDisposable) cr.Target).Dispose();
((IDisposable) cr).Dispose();
}

public static void Main()
{
Application.Init();
new SharpApp();
Application.Run();
}
}
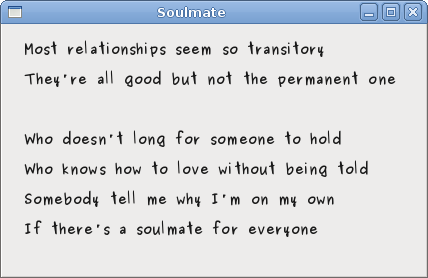
We display part of the lyrics from the Natasha Bedingfields Soulmate song.
cr.SelectFontFace("Purisa", FontSlant.Normal, FontWeight.Bold);
Here we specify the font, that we use. Purisa bold.
cr.SetFontSize(13);
We specify the size of the font.
cr.MoveTo(20, 30);
We move to the point, where we will draw the text.
cr.ShowText("Most relationships seem so transitory");
The ShowText() method draws text onto the window.
Soulmate
Figure: Soulmate
In this chapter of the GTK# programming library, we were drawing with Cairo library.
Continue Reading

Pango library in GTK#

Pango

In this part of the GTK# programming tutorial, we will explore the Pango library.
Pango is a free and open source computing library for rendering internationalized texts in high quality. Different font backends can be used, allowing cross-platform support. (wikipedia)
Pango provides advanced font and text handling that is used for Gdk and Gtk.

Simple example

In our first example, we show, how to change font for our label widget.
quotes.cs
using Gtk;
using System;

class SharpApp : Window {

private Label label;

public SharpApp() : base("Pango")
{
SetPosition(WindowPosition.Center);
DeleteEvent += delegate { Application.Quit(); };

string text = @"Excess of joy is harder to bear than any amount of sorrow.
The more one judges, the less one loves.
There is no such thing as a great talent without great will power. ";

label = new Label(text);

Pango.FontDescription fontdesc = Pango.FontDescription.FromString("Purisa 10");
label.ModifyFont(fontdesc);

Fixed fix = new Fixed();

fix.Put(label, 5, 5);
Add(fix);
ShowAll();
}


public static void Main()
{
Application.Init();
new SharpApp();
Application.Run();
}
}
In the above code example, we have a label widget with three quotations. We change it's font to Purisa 10.
string text = @"Excess of joy is harder to bear than any amount of sorrow.
...
This is the text to show in the label.
Pango.FontDescription fontdesc = Pango.FontDescription.FromString("Purisa 10");
The FontDescription is used to specify the characteristics of a font to load. The FromString() method creates a new font description from a string representation.
label.ModifyFont(fontdesc);
We change the font of the label widget to Purisa 10.
Quotations
Figure: Quotations

System fonts

The next code example shows all available fonts in a TreeView widget.
systemfonts.cs
using System;
using Pango;
using Gtk;


public class SharpApp : Window
{
ListStore store;
FontFamily[] fam;

public SharpApp() : base("System fonts")
{
BorderWidth = 8;

SetDefaultSize(350, 250);
SetPosition(WindowPosition.Center);
DeleteEvent += delegate { Application.Quit(); };


ScrolledWindow sw = new ScrolledWindow();
sw.ShadowType = ShadowType.EtchedIn;
sw.SetPolicy(PolicyType.Automatic, PolicyType.Automatic);

Context context = this.CreatePangoContext();
fam = context.Families;

store = CreateModel();

TreeView treeView = new TreeView(store);
treeView.RulesHint = true;
sw.Add(treeView);

CreateColumn(treeView);

Add(sw);
ShowAll();
}

void CreateColumn(TreeView treeView)
{
CellRendererText rendererText = new CellRendererText();
TreeViewColumn column = new TreeViewColumn("FontName",
rendererText, "text", Column.FontName);
column.SortColumnId = (int) Column.FontName;
treeView.AppendColumn(column);
}


ListStore CreateModel()
{
ListStore store = new ListStore( typeof(string) );

foreach (FontFamily ff in fam) {
store.AppendValues(ff.Name);
}

return store;
}

enum Column
{
FontName
}


public static void Main()
{
Application.Init();
new SharpApp();
Application.Run();
}
}
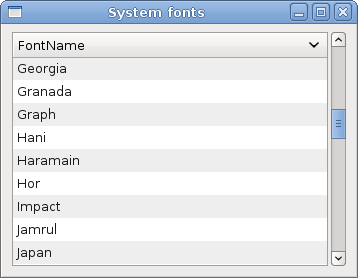
The code example shows all available fonts on a system.
Context context = this.CreatePangoContext();
This code line creates a Pango.Context object. It contains global information about the rendering process of text.
fam = context.Families;
From the context object, we retrieve all available font families.
foreach (FontFamily ff in fam) {
store.AppendValues(ff.Name);
}
During the model creation of the TreeView widget, we get all font names from the array of font families and put them into the list store.
System fonts
Figure: System fonts

Unicode

Pango is used to work with internationalized text.
unicode.cs
using Gtk;
using System;

class SharpApp : Window {


public SharpApp() : base("Unicode")
{
SetPosition(WindowPosition.Center);
DeleteEvent += delegate { Application.Quit(); };

string text = @"Фёдор Михайлович Достоевский родился 30 октября (11 ноября)
1821 года в Москве.Был вторым из 7 детей. Отец, Михаил Андреевич, работал в
госпитале для бедных. Мать, Мария Фёдоровна (в девичестве Нечаева),
происходила из купеческого рода.";

Label label = new Label(text);

Pango.FontDescription fontdesc = Pango.FontDescription.FromString("Purisa 10");
label.ModifyFont(fontdesc);

Fixed fix = new Fixed();

fix.Put(label, 5, 5);
Add(fix);
ShowAll();
}


public static void Main()
{
Application.Init();
new SharpApp();
Application.Run();
}
}
We show some text in azbuka.
string text = @"Фёдор Михайлович Достоевский родился 30 октября ...
We can directly use the unicode text.
Label label = new Label(text);
We normally use it in the label widget.
Unicode
Figure: Unicode

Coloured text

In the final example, we will further explore Pango capabilities. We will draw a centered, coloured text on a DrawingAreawidget.
coloured.cs
using System;
using Gtk;
using Pango;


public class SharpApp : Window
{

public SharpApp () : base ("Australia")
{
SetDefaultSize(250, 200);
SetPosition(WindowPosition.Center);
DeleteEvent += delegate { Application.Quit(); };

Gdk.Color white = new Gdk.Color(255, 255, 255);

DrawingArea drawingArea = new DrawingArea();
drawingArea.ModifyBg(StateType.Normal, white);
drawingArea.ExposeEvent += OnExposeEvent;

Add(drawingArea);

ShowAll();
}

void OnExposeEvent (object sender, ExposeEventArgs a)
{
DrawingArea drawingArea = sender as DrawingArea;

int width = drawingArea.Allocation.Width;

Gdk.PangoRenderer renderer = Gdk.PangoRenderer.GetDefault(drawingArea.Screen);
renderer.Drawable = drawingArea.GdkWindow;
renderer.Gc = drawingArea.Style.BlackGC;

Context context = drawingArea.CreatePangoContext();
Pango.Layout layout = new Pango.Layout(context);

layout.Width = Pango.Units.FromPixels(width);
layout.SetText("Australia");

FontDescription desc = FontDescription.FromString("Serif Bold 20");
layout.FontDescription = desc;

renderer.SetOverrideColor(RenderPart.Foreground, new Gdk.Color(200, 30, 30));
layout.Alignment = Pango.Alignment.Center;
renderer.DrawLayout(layout, 0, 0);

renderer.SetOverrideColor(RenderPart.Foreground, Gdk.Color.Zero);
renderer.Drawable = null;
renderer.Gc = null;
}

public static void Main()
{
Application.Init();
new SharpApp();
Application.Run();
}
}
We draw "Australia" text, horizontally centered, coloured in dark red colour.
Gdk.PangoRenderer renderer = Gdk.PangoRenderer.GetDefault(drawingArea.Screen);
renderer.Drawable = drawingArea.GdkWindow;
renderer.Gc = drawingArea.Style.BlackGC;
We get the default renderer for the screen, and set it up for drawing.
Context context = drawingArea.CreatePangoContext();
Pango.Layout layout = new Pango.Layout(context);
We create a Pango.Layout. It is a high level driver for laying out entire blocks of text.
layout.Width = Pango.Units.FromPixels(width);
We specify the layouts width.
layout.SetText("Australia");
We set our text.
FontDescription desc = FontDescription.FromString("Serif Bold 20");
layout.FontDescription = desc;
We specify a font for our layout.
renderer.SetOverrideColor(RenderPart.Foreground, new Gdk.Color(200, 30, 30));
layout.Alignment = Pango.Alignment.Center;
We set a color and alignment.
renderer.DrawLayout(layout, 0, 0);
We draw the Pango layout.
renderer.SetOverrideColor(RenderPart.Foreground, Gdk.Color.Zero);
renderer.Drawable = null;
renderer.Gc = null;
We clean up resources.
Australia
Figure: Australia
In this chapter of the GTK# programming library, we worked with Pango library.
Continue Reading

Dialogs in GTK#

Dialogs in GTK#

In this part of the GTK# programming tutorial, we will introduce dialogs.
Dialog windows or dialogs are an indispensable part of most modern GUI applications. A dialog is defined as a conversation between two or more persons. In a computer application a dialog is a window which is used to "talk" to the application. A dialog is used to input data, modify data, change the application settings etc. Dialogs are important means of communication between a user and a computer program.

Message dialogs

Message dialogs are convenient dialogs that provide messages to the user of the application. The message consists of textual and image data.
messages.cs
using Gtk;
using System;

class SharpApp : Window {


public SharpApp() : base("Messages")
{
SetDefaultSize(250, 100);
SetPosition(WindowPosition.Center);
DeleteEvent += delegate { Application.Quit(); };


Table table = new Table(2, 2, true);

Button info = new Button("Information");
Button warn = new Button("Warning");
Button ques = new Button("Question");
Button erro = new Button("Error");

info.Clicked += delegate {
MessageDialog md = new MessageDialog(this,
DialogFlags.DestroyWithParent, MessageType.Info,
ButtonsType.Close, "Download completed");
md.Run();
md.Destroy();
};

warn.Clicked += delegate {
MessageDialog md = new MessageDialog(this,
DialogFlags.DestroyWithParent, MessageType.Warning,
ButtonsType.Close, "Unallowed operation");
md.Run();
md.Destroy();
};


ques.Clicked += delegate {
MessageDialog md = new MessageDialog(this,
DialogFlags.DestroyWithParent, MessageType.Question,
ButtonsType.Close, "Are you sure to quit?");
md.Run();
md.Destroy();
};

erro.Clicked += delegate {
MessageDialog md = new MessageDialog (this,
DialogFlags.DestroyWithParent, MessageType.Error,
ButtonsType.Close, "Error loading file");
md.Run();
md.Destroy();
};

table.Attach(info, 0, 1, 0, 1);
table.Attach(warn, 1, 2, 0, 1);
table.Attach(ques, 0, 1, 1, 2);
table.Attach(erro, 1, 2, 1, 2);

Add(table);

ShowAll();
}

public static void Main()
{
Application.Init();
new SharpApp();
Application.Run();
}
}
In our example, we will show four kinds of message dialogs. Information, Warning, Question and Error message dialogs.
Button info = new Button("Information");
Button warn = new Button("Warning");
Button ques = new Button("Question");
Button erro = new Button("Error");
We have four buttons. Each of these buttons will show a different kind of message dialog.
info.Clicked += delegate {
MessageDialog md = new MessageDialog(this,
DialogFlags.DestroyWithParent, MessageType.Info,
ButtonsType.Close, "Download completed");
md.Run();
md.Destroy();
};
If we click on the info button, the Information dialog is displayed. The MessageType.Info specifies the type of the dialog. The ButtonsType.Close specifies the button to be displayed in the dialog. The last parameter is the message dislayed. The dialog is displayed with the Run() method. The programmer must also call either the Destroy() or the Hide() method.
Information message dialog   Warning message dialog   Question message dialog   Error message dialog

AboutDialog

The AboutDialog displays information about the application. AboutDialog can display a logo, the name of the application, version, copyright, website or licence information. It is also possible to give credits to the authors, documenters, translators and artists.
aboutdialog.cs
using Gtk;
using System;

class SharpApp : Window {


public SharpApp() : base("About")
{
SetDefaultSize(300, 270);
SetPosition(WindowPosition.Center);
DeleteEvent += delegate { Application.Quit(); } ;

Button button = new Button("About");
button.Clicked += OnClicked;

Fixed fix = new Fixed();
fix.Put(button, 20, 20);
Add(fix);

ShowAll();
}


void OnClicked(object sender, EventArgs args)
{
AboutDialog about = new AboutDialog();
about.ProgramName = "Battery";
about.Version = "0.1";
about.Copyright = "(c) Jan Bodnar";
about.Comments = @"Battery is a simple tool for
battery checking";
about.Website = "http://www.zetcode.com";
about.Logo = new Gdk.Pixbuf("battery.png");
about.Run();
about.Destroy();
}


public static void Main()
{
Application.Init();
new SharpApp();
Application.Run();
}
}
The code example uses a AboutDialog with some of it's features.
AboutDialog about = new AboutDialog();
We create an AboutDialog.
about.ProgramName = "Battery";
about.Version = "0.1";
about.Copyright = "(c) Jan Bodnar";
By setting the properties of the dialog, we specify the name, version and the copyright.
about.Logo = new Gdk.Pixbuf("battery.png");
This line creates a logo.
AboutDialog
Figure: AboutDialog

FontSelectionDialog

The FontSelectionDialog is a dialog for selecting fonts. It is typically used in applications, that do some text editing or formatting.
fontdialog.cs
using Gtk;
using System;

class SharpApp : Window {

Label label;

public SharpApp() : base("Font Selection Dialog")
{
SetDefaultSize(300, 220);
SetPosition(WindowPosition.Center);
DeleteEvent += delegate { Application.Quit(); } ;

label = new Label("The only victory over love is flight.");
Button button = new Button("Select font");
button.Clicked += OnClicked;

Fixed fix = new Fixed();
fix.Put(button, 100, 30);
fix.Put(label, 30, 90);
Add(fix);

ShowAll();
}


void OnClicked(object sender, EventArgs args)
{
FontSelectionDialog fdia = new FontSelectionDialog("Select font name");
fdia.Response += delegate (object o, ResponseArgs resp) {

if (resp.ResponseId == ResponseType.Ok) {
Pango.FontDescription fontdesc =
Pango.FontDescription.FromString(fdia.FontName);
label.ModifyFont(fontdesc);
}
};

fdia.Run();
fdia.Destroy();
}

public static void Main()
{
Application.Init();
new SharpApp();
Application.Run();
}
}
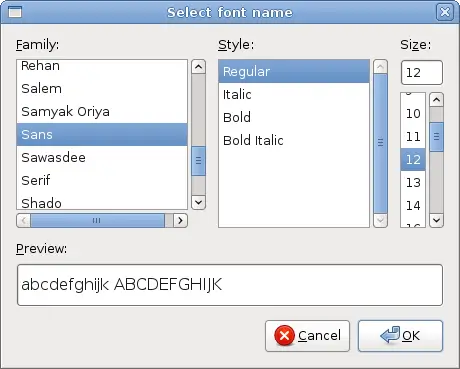
In the code example, we have a button and a label. We show the FontSelectionDialog by clicking on the button.
FontSelectionDialog fdia = new FontSelectionDialog("Select font name");
We create the FontSelectionDialog.
fdia.Response += delegate (object o, ResponseArgs resp) {

if (resp.ResponseId == ResponseType.Ok) {
Pango.FontDescription fontdesc = Pango.FontDescription.FromString(fdia.FontName);
label.ModifyFont(fontdesc);
}
};
If we click on the OK button, the font of the label widget changes to the one, that we selected in the dialog.
FontSelectionDialog
Figure: FontSelectionDialog

ColorSelectionDialog

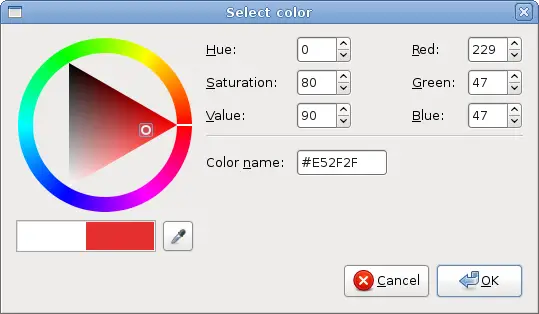
ColorSelectionDialog is a dialog for selecting a color.
colordialog.cs
using Gtk;
using System;

class SharpApp : Window {

Label label;

public SharpApp() : base("Color Dialog")
{
SetDefaultSize(300, 220);
SetPosition(WindowPosition.Center);
DeleteEvent += delegate { Application.Quit(); } ;

label = new Label("The only victory over love is flight.");
Button button = new Button("Select color");
button.Clicked += OnClicked;

Fixed fix = new Fixed();
fix.Put(button, 100, 30);
fix.Put(label, 30, 90);
Add(fix);

ShowAll();
}


void OnClicked(object sender, EventArgs args)
{
ColorSelectionDialog cdia = new ColorSelectionDialog("Select color");
cdia.Response += delegate (object o, ResponseArgs resp) {

if (resp.ResponseId == ResponseType.Ok) {
label.ModifyFg(StateType.Normal, cdia.ColorSelection.CurrentColor);
}
};

cdia.Run();
cdia.Destroy();
}


public static void Main()
{
Application.Init();
new SharpApp();
Application.Run();
}
}
The example is very similar to the previous one. This time we change the color of the label.
ColorSelectionDialog cdia = new ColorSelectionDialog("Select color");
We create the ColorSelectionDialog.
cdia.Response += delegate (object o, ResponseArgs resp) {

if (resp.ResponseId == ResponseType.Ok) {
label.ModifyFg(StateType.Normal, cdia.ColorSelection.CurrentColor);
}
};
If the user pressed OK, we get the color and modify the label's color.
ColorSelectionDialog
Figure: ColorSelectionDialog
In this part of the GTK# tutorial, we talked about dialogs.
Continue Reading

Advanced widgets in GTK#

Advanced widgets in GTK#

In this part of the GTK# programming tutorial, we will introduce some more advanced widgets in the GTK#. We will cover IconView, ListView and TreeView widgets.

IconView

The IconView is a widget which displays a list of icons in a grid.
iconview.cs
using System;
using System.IO;
using Gtk;


public class SharpApp : Window
{
const int COL_PATH = 0;
const int COL_DISPLAY_NAME = 1;
const int COL_PIXBUF = 2;
const int COL_IS_DIRECTORY = 3;

DirectoryInfo root = new DirectoryInfo("/");
Gdk.Pixbuf dirIcon, fileIcon;
ListStore store;
ToolButton upButton;

public SharpApp() : base("IconView")
{
SetDefaultSize(650, 400);
SetPosition(WindowPosition.Center);
DeleteEvent += delegate { Application.Quit(); };

VBox vbox = new VBox(false, 0);
Add(vbox);

Toolbar toolbar = new Toolbar();
vbox.PackStart(toolbar, false, false, 0);

upButton = new ToolButton(Stock.GoUp);
upButton.IsImportant = true;
upButton.Sensitive = false;
toolbar.Insert(upButton, -1);

ToolButton homeButton = new ToolButton(Stock.Home);
homeButton.IsImportant = true;
toolbar.Insert(homeButton, -1);

fileIcon = GetIcon(Stock.File);
dirIcon = GetIcon(Stock.Open);

ScrolledWindow sw = new ScrolledWindow();
sw.ShadowType = ShadowType.EtchedIn;
sw.SetPolicy(PolicyType.Automatic, PolicyType.Automatic);
vbox.PackStart(sw, true, true, 0);

store = CreateStore();
FillStore();

IconView iconView = new IconView(store);
iconView.SelectionMode = SelectionMode.Multiple;

upButton.Clicked += new EventHandler(OnUpClicked);
homeButton.Clicked += new EventHandler(OnHomeClicked);

iconView.TextColumn = COL_DISPLAY_NAME;
iconView.PixbufColumn = COL_PIXBUF;

iconView.ItemActivated += OnItemActivated;
sw.Add(iconView);
iconView.GrabFocus();

ShowAll();
}

Gdk.Pixbuf GetIcon(string name)
{
return Gtk.IconTheme.Default.LoadIcon(name, 48, (IconLookupFlags) 0);
}

ListStore CreateStore()
{
ListStore store = new ListStore(typeof (string),
typeof(string), typeo (Gdk.Pixbuf), typeof(bool));

store.SetSortColumnId(COL_DISPLAY_NAME, SortType.Ascending);

return store;
}

void FillStore()
{
store.Clear();

if (!root.Exists)
return;

foreach (DirectoryInfo di in root.GetDirectories())
{
if (!di.Name.StartsWith("."))
store.AppendValues(di.FullName, di.Name, dirIcon, true);
}

foreach (FileInfo file in root.GetFiles())
{
if (!file.Name.StartsWith("."))
store.AppendValues(file.FullName, file.Name, fileIcon, false);
}
}

void OnHomeClicked(object sender, EventArgs a)
{
root = new DirectoryInfo(Environment.GetFolderPath(
Environment.SpecialFolder.Personal));
FillStore();
upButton.Sensitive = true;
}

void OnItemActivated(object sender, ItemActivatedArgs a)
{
TreeIter iter;
store.GetIter(out iter, a.Path);
string path = (string) store.GetValue(iter, COL_PATH);
bool isDir = (bool) store.GetValue(iter, COL_IS_DIRECTORY);

if (!isDir)
return;

root = new DirectoryInfo(path);
FillStore();

upButton.Sensitive = true;
}

void OnUpClicked(object sender, EventArgs a)
{
root = root.Parent;
FillStore();
upButton.Sensitive = (root.FullName == "/" ? false : true);
}

public static void Main()
{
Application.Init();
new SharpApp();
Application.Run();
}
}
This example shows icons of the currently selected directory. It has a toolbar and two buttons. Up button and home button. We use them to navigate through the file system.
ListStore store;
The ListStore is a columned list data structure. We use it to store our data for the IconView widget.
DirectoryInfo root = new DirectoryInfo("/");
This is the root directory. We start here. The root directory is the directory, which we show in the IconViewwidget.
ListStore store = new ListStore(typeof(string), 
typeof(string), typeof(Gdk.Pixbuf), typeof(bool));
In the CreateStore() method, we create the ListStore object. It has four parameters. The path, the name of the directory or file, image and the boolean value determining, if it is an directory or a file.
foreach (DirectoryInfo di in root.GetDirectories())
{
if (!di.Name.StartsWith("."))
store.AppendValues(di.FullName, di.Name, dirIcon, true);
}
In the FillStore() method, we fill the list store with data. Here, we find out all directories in the current path.
void OnHomeClicked(object sender, EventArgs a)
{
root = new DirectoryInfo(Environment.GetFolderPath(Environment.SpecialFolder.Personal));
FillStore();
upButton.Sensitive = true;
}
If we click on the home button, we get the reference to the home directory. Refill the list store. And make the up button active.
void OnItemActivated(object sender, ItemActivatedArgs a)
{
...
}
In the OnItemActivated() method, we react to an event, which is generated, when we click on a icon from the icon view widget.
string path = (string) store.GetValue(iter, COL_PATH);
bool isDir = (bool) store.GetValue(iter, COL_IS_DIRECTORY);

if (!isDir)
return;
We get the path of the activated item. And we determine, if it is a directory or a file. If it is a file, we return.
root = new DirectoryInfo(path);
FillStore();

upButton.Sensitive = true;
In case it is a directory, we replace the root with the current path, refill the store and make the up button sensitive.
void OnUpClicked(object sender, EventArgs a)
{
root = root.Parent;
FillStore();
upButton.Sensitive = (root.FullName == "/" ? false : true);
}
If we click on the up button, we replace the root directory with it's parent directory. Refill the list store. And the up button is activated, if we are below the root (/) directory of the file system.
IconView
Figure: IconView

ListView

In the following example, we use the TreeView widget to show a list view. Again the ListStore is used to store data.
listview.cs
using System;
using System.Collections;
using Gtk;

public class Actress
{
public string Name;
public string Place;
public int Year;

public Actress(string name, string place, int year)
{
Name = name;
Place = place;
Year = year;
}
}

public class SharpApp : Window
{
ListStore store;
Statusbar statusbar;

enum Column
{
Name,
Place,
Year
}

Actress[] actresses =
{
new Actress("Jessica Alba", "Pomona", 1981),
new Actress("Sigourney Weaver", "New York", 1949),
new Actress("Angelina Jolie", "Los Angeles", 1975),
new Actress("Natalie Portman", "Jerusalem", 1981),
new Actress("Rachel Weissz", "London", 1971),
new Actress("Scarlett Johansson", "New York", 1984)
};

public SharpApp() : base ("ListView")
{
BorderWidth = 8;

SetDefaultSize(350, 250);
SetPosition(WindowPosition.Center);
DeleteEvent += delegate { Application.Quit(); };

VBox vbox = new VBox(false, 8);


ScrolledWindow sw = new ScrolledWindow();
sw.ShadowType = ShadowType.EtchedIn;
sw.SetPolicy(PolicyType.Automatic, PolicyType.Automatic);
vbox.PackStart(sw, true, true, 0);

store = CreateModel();

TreeView treeView = new TreeView(store);
treeView.RulesHint = true;
treeView.RowActivated += OnRowActivated;
sw.Add(treeView);

AddColumns(treeView);

statusbar = new Statusbar();

vbox.PackStart(statusbar, false, false, 0);

Add(vbox);
ShowAll();
}

void OnRowActivated (object sender, RowActivatedArgs args) {

TreeIter iter;
TreeView view = (TreeView) sender;

if (view.Model.GetIter(out iter, args.Path)) {
string row = (string) view.Model.GetValue(iter, (int) Column.Name );
row += ", " + (string) view.Model.GetValue(iter, (int) Column.Place );
row += ", " + view.Model.GetValue(iter, (int) Column.Year );
statusbar.Push(0, row);
}
}

void AddColumns(TreeView treeView)
{
CellRendererText rendererText = new CellRendererText();
TreeViewColumn column = new TreeViewColumn("Name", rendererText,
"text", Column.Name);
column.SortColumnId = (int) Column.Name;
treeView.AppendColumn(column);

rendererText = new CellRendererText();
column = new TreeViewColumn("Place", rendererText,
"text", Column.Place);
column.SortColumnId = (int) Column.Place;
treeView.AppendColumn(column);

rendererText = new CellRendererText();
column = new TreeViewColumn("Year", rendererText,
"text", Column.Year);
column.SortColumnId = (int) Column.Year;
treeView.AppendColumn(column);
}


ListStore CreateModel()
{
ListStore store = new ListStore( typeof(string),
typeof(string), typeof(int) );

foreach (Actress act in actresses) {
store.AppendValues(act.Name, act.Place, act.Year );
}

return store;
}

public static void Main()
{
Application.Init();
new SharpApp();
Application.Run();
}
}
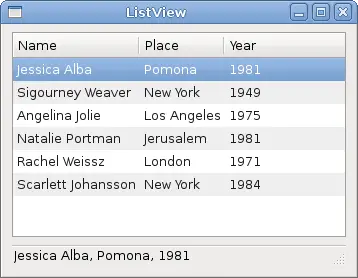
In our example, we show a list of six actresses in the TreeViewwidget. Each of the rows shows the name, the place of born and the year of born for each of them.
public class Actress
{
public string Name;
public string Place;
public int Year;
...
}
The Actress class is used for storing data about an actress.
ListStore CreateModel()
{
ListStore store = new ListStore( typeof(string),
typeof(string), typeof(int) );

foreach (Actress act in actresses) {
store.AppendValues(act.Name, act.Place, act.Year );
}

return store;
}
In the CreateModel() method, we create the list store. The list store has three parameters. The name of the actress, the place of born and year of born. This is the data model of our TreeViewwidget.
TreeView treeView = new TreeView(store);
treeView.RulesHint = true;
treeView.RowActivated += OnRowActivated;
Here we create the TreeView widget, taking the list store as a parameter.
CellRendererText rendererText = new CellRendererText();
TreeViewColumn column = new TreeViewColumn("Name", rendererText, "text", Column.Name);
column.SortColumnId = (int) Column.Name;
treeView.AppendColumn(column);
In the AddColumns() method, we add three columns to our TreeView widget. The above code creates a column displaying names of the actresses.
if (view.Model.GetIter(out iter, args.Path)) {
string row = (string) view.Model.GetValue(iter, (int) Column.Name );
row += ", " + (string) view.Model.GetValue(iter, (int) Column.Place );
row += ", " + view.Model.GetValue(iter, (int) Column.Year );
statusbar.Push(0, row);
}
If we double click on an item, we display the whole row in the statusbar.
ListView
Figure: ListView

TreeView

In the last example of this chapter, we use the TreeViewwidget to show a hierarchical tree of data.
tree.cs
using Gtk;


public class SharpApp : Window
{

public SharpApp() : base ("Tree")
{
SetDefaultSize(400, 300);
SetPosition(WindowPosition.Center);
DeleteEvent += delegate { Application.Quit(); };

TreeView tree = new TreeView();

TreeViewColumn languages = new TreeViewColumn();
languages.Title = "Programming languages";

CellRendererText cell = new CellRendererText();
languages.PackStart(cell, true);
languages.AddAttribute(cell, "text", 0);

TreeStore treestore = new TreeStore(typeof(string), typeof(string));

TreeIter iter = treestore.AppendValues("Scripting languages");
treestore.AppendValues(iter, "Python");
treestore.AppendValues(iter, "PHP");
treestore.AppendValues(iter, "Perl");
treestore.AppendValues(iter, "Ruby");

iter = treestore.AppendValues("Compiling languages");
treestore.AppendValues(iter, "C#");
treestore.AppendValues(iter, "C++");
treestore.AppendValues(iter, "C");
treestore.AppendValues(iter, "Java");

tree.AppendColumn(languages);
tree.Model = treestore;

Add(tree);
ShowAll();
}

public static void Main()
{
Gtk.Application.Init();
new SharpApp();
Gtk.Application.Run();
}
}
This time we use the TreeView widget to show hierarchical data.
TreeView tree = new TreeView();
TreeView widget is created.
TreeViewColumn languages = new TreeViewColumn();
languages.Title = "Programming languages";
It has one column named "Programming languages".
CellRendererText cell = new CellRendererText();
languages.PackStart(cell, true);
languages.AddAttribute(cell, "text", 0);
We show textual data in the TreeView widget.
TreeStore treestore = new TreeStore(typeof(string), typeof(string));
To store the data, we use the TreeStore object.
TreeIter iter = treestore.AppendValues("Scripting languages");
treestore.AppendValues(iter, "Python");
treestore.AppendValues(iter, "PHP");
We append data to the tree. The TreeIter is for accessing data in a row.
tree.AppendColumn(languages);
A column is appended to the tree.
tree.Model = treestore;
Finally, we set a data model for the tree widget.
Tree
Figure: Tree
In this chapter, we were talking about advanced GTK# widgets.
Continue Reading

Introducing Widgets in GTK#

Introducing Widgets in GTK#

In this part of the GTK# programming tutorial, we continue introducing GTK# widgets.
We will cover the Entry widget, the Scale widget, ToggleButton and Calendar widget.

Entry

The Entry is a single line text entry field. This widget is used to enter textual data.
entry.cs
using Gtk;
using System;

class SharpApp : Window {

Label label;

public SharpApp() : base("Entry")
{
SetDefaultSize(250, 200);
SetPosition(WindowPosition.Center);
BorderWidth = 7;
DeleteEvent += delegate { Application.Quit(); };

label = new Label("...");

Entry entry = new Entry();
entry.Changed += OnChanged;

Fixed fix = new Fixed();
fix.Put(entry, 60, 100);
fix.Put(label, 60, 40);

Add(fix);

ShowAll();
}

void OnChanged(object sender, EventArgs args)
{
Entry entry = (Entry) sender;
label.Text = entry.Text;
}

public static void Main()
{
Application.Init();
new SharpApp();
Application.Run();
}
}
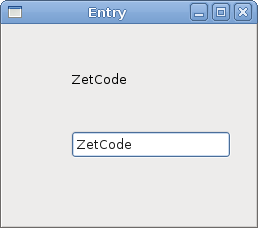
This example shows an entry widget and a label. The text that we key in the entry is displayed immediately in the label control.
Entry entry = new Entry();
Entry widget is created.
entry.Changed += OnChanged;
If the text in the Entry widget is changed, we call the OnChanged() method.
void OnChanged(object sender, EventArgs args)
{
Entry entry = (Entry) sender;
label.Text = entry.Text;
}
We get the text from the Entry widget and set it to the label.
Entry Widget
Figure: Entry Widget

Scale

The Scale is a widget, that lets the user graphically select a value by sliding a knob within a bounded interval. Our example will show a volume control.
hscale.cs
using Gtk;
using System;

class SharpApp : Window {

Gdk.Pixbuf mute, min, med, max;
Image image;

public SharpApp() : base("Scale")
{
SetDefaultSize(260, 150);
SetPosition(WindowPosition.Center);
DeleteEvent += delegate { Application.Quit(); };

HScale scale = new HScale(0, 100, 1);
scale.SetSizeRequest(160, 35);
scale.ValueChanged += OnChanged;

LoadPixbufs();

image = new Image(mute);

Fixed fix = new Fixed();
fix.Put(scale, 20, 40);
fix.Put(image, 219, 50);

Add(fix);

ShowAll();
}

void LoadPixbufs()
{
try {
mute = new Gdk.Pixbuf("mute.png");
min = new Gdk.Pixbuf("min.png");
med = new Gdk.Pixbuf("med.png");
max = new Gdk.Pixbuf("max.png");
} catch {
Console.WriteLine("Error reading Pixbufs");
Environment.Exit(1);
}
}

void OnChanged(object obj, EventArgs args)
{
HScale scale = (HScale) obj;
double val = scale.Value;

if (val == 0) {
image.Pixbuf = mute;
} else if (val > 0 && val <= 30) {
image.Pixbuf = min;
} else if (val > 30 && val < 80) {
image.Pixbuf = med;
} else {
image.Pixbuf = max;
}
}

public static void Main()
{
Application.Init();
new SharpApp();
Application.Run();
}
}
In the example above, we have HScale and Image widgets. By dragging the scale we change the image on the Image widget.
HScale scale = new HScale(0, 100, 1);
HScale widget is created. The parameters are lower boundary, upper boundary and step.
HScale scale = (HScale) obj;
double val = scale.Value;
In the OnChange() method we obtain the value of the scale widget.
if (val == 0) {
image.Pixbuf = mute;
} else if (val > 0 && val <= 30) {
image.Pixbuf = min;
} else if (val > 30 && val < 80) {
image.Pixbuf = med;
} else {
image.Pixbuf = max;
}
Depending on the obtained value, we change the picture in the image widget.
HScale Widget
Figure: HScale Widget

ToggleButton

ToggleButton is a button that has two states. Pressed and not pressed. You toggle between these two states by clicking on it. There are situations where this functionality fits well.
togglebuttons.cs
using Gtk;
using System;

class SharpApp : Window {

DrawingArea darea;
Gdk.Color col;

public SharpApp() : base("ToggleButtons")
{
col = new Gdk.Color(0, 0, 0);

SetDefaultSize(350, 240);
SetPosition(WindowPosition.Center);
BorderWidth = 7;
DeleteEvent += delegate { Application.Quit(); };

ToggleButton red = new ToggleButton("Red");
red.SetSizeRequest(80, 35);
red.Clicked += OnRed;

ToggleButton green = new ToggleButton("Green");
green.SetSizeRequest(80, 35);
green.Clicked += OnGreen;

ToggleButton blue = new ToggleButton("Blue");
blue.SetSizeRequest(80, 35);
blue.Clicked += OnBlue;

darea = new DrawingArea();
darea.SetSizeRequest(150, 150);
darea.ModifyBg(StateType.Normal, col);

Fixed fix = new Fixed();
fix.Put(red, 30, 30);
fix.Put(green, 30, 80);
fix.Put(blue, 30, 130);
fix.Put(darea, 150, 30);

Add(fix);

ShowAll();
}

void OnRed(object sender, EventArgs args)
{
ToggleButton tb = (ToggleButton) sender;

if (tb.Active) {
col.Red = 65535;
} else {
col.Red = 0;
}

darea.ModifyBg(StateType.Normal, col);
}

void OnGreen(object sender, EventArgs args)
{
ToggleButton tb = (ToggleButton) sender;

if (tb.Active) {
col.Green = 65535;
} else {
col.Green = 0;
}

darea.ModifyBg(StateType.Normal, col);
}

void OnBlue(object sender, EventArgs args)
{
ToggleButton tb = (ToggleButton) sender;

if (tb.Active) {
col.Blue = 65535;
} else {
col.Blue = 0;
}

darea.ModifyBg(StateType.Normal, col);
}

public static void Main()
{
Application.Init();
new SharpApp();
Application.Run();
}
}
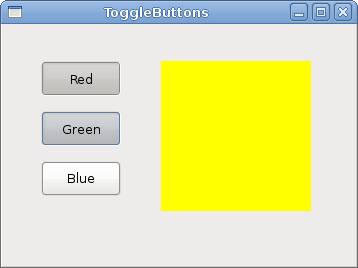
In our example, we show three toggle buttons and a DrawingArea. We set the background color of the area to black. The togglebuttons will toggle the red, green and blue parts of the color value. The background color will depend on which togglebuttons we have pressed.
col = new Gdk.Color(0, 0, 0);
This is the color value that is going to be updated with the toggle buttons.
ToggleButton red = new ToggleButton("Red");
red.SetSizeRequest(80, 35);
red.Clicked += OnRed;
The ToggleButton widget is created. We set it's size to 80x35 pixels. Each of the toggle buttons has it's own handler method.
darea = new DrawingArea();
darea.SetSizeRequest(150, 150);
darea.ModifyBg(StateType.Normal, col);
The DrawingArea widget is the widget, that displays the color, mixed by the toggle buttons. At start, it shows black color.
if (tb.Active) {
col.Red = 65535;
} else {
col.Red = 0;
}
We update the red part of the color according to the value of the Active property.
darea.ModifyBg(StateType.Normal, col);
We update the color of the DrawingArea widget.
ToggleButton widget
Figure: ToggleButton widget

Calendar

Our final widget is the Calendar widget. It is used to work with dates.
calendar.cs
using Gtk;
using System;

class SharpApp : Window {

private Label label;

public SharpApp() : base("Calendar")
{
SetDefaultSize(300, 270);
SetPosition(WindowPosition.Center);
DeleteEvent += delegate { Application.Quit(); };

label = new Label("...");

Calendar calendar = new Calendar();
calendar.DaySelected += OnDaySelected;

Fixed fix = new Fixed();
fix.Put(calendar, 20, 20);
fix.Put(label, 40, 230);

Add(fix);

ShowAll();
}

void OnDaySelected(object sender, EventArgs args)
{
Calendar cal = (Calendar) sender;
label.Text = cal.Month + 1 + "/" + cal.Day + "/" + cal.Year;
}

public static void Main()
{
Application.Init();
new SharpApp();
Application.Run();
}
}
We have the Calendar widget and a Label. The selected day from the calendar is shown in the label.
Calendar calendar = new Calendar();
Calendar widget is created.
Calendar cal = (Calendar) sender;
label.Text = cal.Month + 1 + "/" + cal.Day + "/" + cal.Year;
In the OnDaySelected() method we get the referece to the Calendar widget, and update the label to the currently selected date.
Calendar
Figure: Calendar
In this chapter, we finished talking about the GTK# widgets.
Continue Reading

Widgets in GTK#

Widgets in GTK#

In this part of the GTK# programming tutorial, we will introduce some GTK# widgets.
Widgets are basic building blocks of a GUI application. Over the years, several widgets became a standard in all toolkits on all OS platforms. For example a button, a check box or a scroll bar. The GTK# toolkit's philosophy is to keep the number of widgets at a minimum level. More specialized widgets are created as custom GTK# widgets.

Label

The Label widget shows text.
label.cs
using Gtk;

class SharpApp : Window {

string text = @"Meet you downstairs in the bar and heard
your rolled up sleeves and your skull t-shirt
You say why did you do it with him today?
and sniff me out like I was Tanqueray

cause you're my fella, my guy
hand me your stella and fly
by the time I'm out the door
you tear men down like Roger Moore

I cheated myself
like I knew I would
I told ya, I was trouble
you know that I'm no good";


public SharpApp() : base("You know I'm No Good")
{
BorderWidth = 8;
SetPosition(WindowPosition.Center);

DeleteEvent += delegate { Application.Quit(); };

Label lyrics = new Label(text);
Add(lyrics);

ShowAll();
}

public static void Main()
{
Application.Init();
new SharpApp();
Application.Run();
}
}
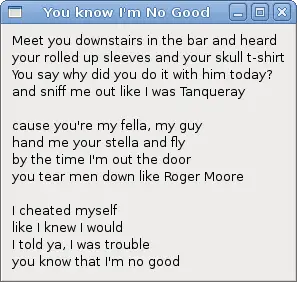
The code example shows some lyrics on the window.
    string text = @"Meet you downstairs in the bar and heard
your rolled up sleeves and your skull t-shirt
...
In C# programming language, multiline string is preceded with the @ character.
BorderWidth = 8;
The Label is surrounded by some empty space.
Label lyrics = new Label(text);
Add(lyrics);
The Label widget is created and added to the window.
Label Widget
Figure: Label Widget

CheckButton

CheckButton is a widget, that has two states. On and Off. The On state is visualised by a check mark. It is used to denote some boolean property.
checkbutton.cs
using Gtk;
using System;

class SharpApp : Window {


public SharpApp() : base("CheckButton")
{
SetDefaultSize(250, 200);
SetPosition(WindowPosition.Center);

DeleteEvent += delegate { Application.Quit(); };

CheckButton cb = new CheckButton("Show title");
cb.Active = true;
cb.Toggled += OnToggle;

Fixed fix = new Fixed();
fix.Put(cb, 50, 50);

Add(fix);
ShowAll();
}


void OnToggle(object sender, EventArgs args)
{
CheckButton cb = (CheckButton) sender;

if (cb.Active) {
Title = "CheckButton";
} else {
Title = " ";
}
}

public static void Main()
{
Application.Init();
new SharpApp();
Application.Run();
}
}
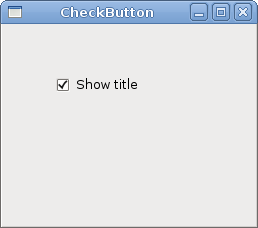
We will display a title in the titlebar of the window, depending on the state of the CheckButton.
CheckButton cb = new CheckButton("Show title");
CheckButton widget is created.
cb.Active = true;
The title is visible by default, so we check the check button by default.
CheckButton cb = (CheckButton) sender;
Here we cast the sender object to CheckButton class.
if (cb.Active) {
Title = "CheckButton";
} else {
Title = " ";
}
Depending on the Active property of the CheckButton, we show or hide the title of the window.
CheckButton
Figure: CheckButton

ComboBox

ComboBox is a widget that allows the user to choose from a list of options.
combobox.cs
using Gtk;
using System;

class SharpApp : Window {


Label label;

public SharpApp() : base("ComboBox")
{
string[] distros = new string[] {"Ubuntu",
"Mandriva",
"Red Hat",
"Fedora",
"Gentoo" };


SetDefaultSize(250, 200);
SetPosition(WindowPosition.Center);
BorderWidth = 7;
DeleteEvent += delegate { Application.Quit(); };

Fixed fix = new Fixed();

ComboBox cb = new ComboBox(distros);
cb.Changed += OnChanged;
label = new Label("-");

fix.Put(cb, 50, 30);
fix.Put(label, 50, 140);
Add(fix);

ShowAll();
}

void OnChanged(object sender, EventArgs args)
{
ComboBox cb = (ComboBox) sender;
label.Text = cb.ActiveText;
}

public static void Main()
{
Application.Init();
new SharpApp();
Application.Run();
}
}
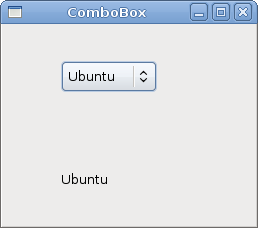
The example shows a combo box and a label. The combo box has a list of six options. These are the names of Linux Distros. The label widget shows the selected option from the combo box.
string[] distros = new string[] {"Ubuntu",
"Mandriva",
"Red Hat",
"Fedora",
"Gentoo" };
This is an array of strings, that will be shown in the ComboBox widget.
ComboBox cb = new ComboBox(distros);
The ComboBox widget is created. The constructor takes the array of strings as a parameter.
void OnChanged(object sender, EventArgs args)
{
ComboBox cb = (ComboBox) sender;
label.Text = cb.ActiveText;
}
Inside the OnChanged() method, we get the selected text out of the combo box and set it to the label.
ComboBox
Figure: ComboBox

Image

The next example introduces the Image widget. This widget displays pictures.
image.cs
using Gtk;
using System;

class SharpApp : Window {

Gdk.Pixbuf castle;

public SharpApp() : base("Red Rock")
{
BorderWidth = 1;
SetPosition(WindowPosition.Center);
DeleteEvent += delegate { Application.Quit(); };

try {
castle = new Gdk.Pixbuf("redrock.png");
} catch {
Console.WriteLine("Image not found");
Environment.Exit(1);
}

Image image = new Image(castle);
Add(image);

ShowAll();
}

public static void Main()
{
Application.Init();
new SharpApp();
Application.Run();
}
}
We show the Red Rock castle in the window.
 try {
castle = new Gdk.Pixbuf("redrock.png");
} catch {
Console.WriteLine("Image not found");
Environment.Exit(1);
}
We create the Gdk.Pixbuf widget. We put the constructor between the try/catch keywords to handle possible errors.
Image image = new Image(castle);
Add(image);
Image widget is created and added to the window.
Image
Figure: Image
In this chapter, we showed the first pack of basic widgets of the GTK# programming library.
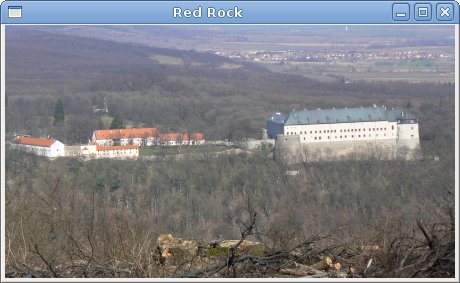
Continue Reading