Showing posts with label PySide. Show all posts

The Tetris game in PySide

Tetris game in PySide

Creating a computer game is challenging. Sooner or later, a programmer will want to create a computer game one day. In fact, many people became interested in programming, because they played games and wanted to create their own. Creating a computer game will help improving your programming skills.

Tetris

The Tetris game is one of the most popular computer games ever created. The original game was designed and programmed by a Russian programmer Alexey Pajitnov in 1985. Since then, Tetris is available on almost every computer platform in lots of variations. Even my mobile phone has a modified version of the Tetris game.
Tetris is called a falling block puzzle game. In this game, we have seven different shapes called tetrominoes. S-shape, Z-shape, T-shape, L-shape, Line-shape, MirroredL-shape and a Square-shape. Each of these shapes is formed with four squares. The shapes are falling down the board. The object of the Tetris game is to move and rotate the shapes, so that they fit as much as possible. If we manage to form a row, the row is destroyed and we score. We play the Tetris game until we top out.
Tetrominoes
Figure: Tetrominoes
PySide is a toolkit designed to create applications. There are other libraries which are targeted at creating computer games. Nevertheless, PySide and other application toolkits can be used to create games.

The development

We do not have images for our Tetris game, we draw the tetrominoes using the drawing API available in the PySide programming toolkit. Behind every computer game, there is a mathematical model. So it is in Tetris.
Some ideas behind the game.
  • We use QtCore.QBasicTimer() to create a game cycle
  • The tetrominoes are drawn
  • The shapes move on a square by square basis (not pixel by pixel)
  • Mathematically a board is a simple list of numbers
#!/usr/bin/python
# -*- coding: utf-8 -*-

"""
ZetCode PySide tutorial

This is a simple Tetris clone
in PySide.

author: Jan Bodnar
website: zetcode.com
last edited: August 2011
"""

import sys, random
from PySide import QtCore, QtGui

class Communicate(QtCore.QObject):

msgToSB = QtCore.Signal(str)

class Tetris(QtGui.QMainWindow):

def __init__(self):
super(Tetris, self).__init__()

self.setGeometry(300, 300, 180, 380)
self.setWindowTitle('Tetris')
self.Tetrisboard = Board(self)

self.setCentralWidget(self.Tetrisboard)

self.statusbar = self.statusBar()
self.Tetrisboard.c.msgToSB[str].connect(self.statusbar.showMessage)

self.Tetrisboard.start()
self.center()

def center(self):

screen = QtGui.QDesktopWidget().screenGeometry()
size = self.geometry()
self.move((screen.width()-size.width())/2,
(screen.height()-size.height())/2)


class Board(QtGui.QFrame):

BoardWidth = 10
BoardHeight = 22
Speed = 300

def __init__(self, parent):
super(Board, self).__init__()

self.timer = QtCore.QBasicTimer()
self.isWaitingAfterLine = False
self.curPiece = Shape()
self.nextPiece = Shape()
self.curX = 0
self.curY = 0
self.numLinesRemoved = 0
self.board = []

self.setFocusPolicy(QtCore.Qt.StrongFocus)
self.isStarted = False
self.isPaused = False
self.clearBoard()

self.c = Communicate()

self.nextPiece.setRandomShape()

def shapeAt(self, x, y):
return self.board[(y * Board.BoardWidth) + x]

def setShapeAt(self, x, y, shape):
self.board[(y * Board.BoardWidth) + x] = shape

def squareWidth(self):
return self.contentsRect().width() / Board.BoardWidth

def squareHeight(self):
return self.contentsRect().height() / Board.BoardHeight

def start(self):
if self.isPaused:
return

self.isStarted = True
self.isWaitingAfterLine = False
self.numLinesRemoved = 0
self.clearBoard()

self.c.msgToSB.emit(str(self.numLinesRemoved))

self.newPiece()
self.timer.start(Board.Speed, self)

def pause(self):

if not self.isStarted:
return

self.isPaused = not self.isPaused

if self.isPaused:
self.timer.stop()
self.c.msgToSB.emit("paused")
else:
self.timer.start(Board.Speed, self)
self.c.msgToSB.emit(str(self.numLinesRemoved))

self.update()

def paintEvent(self, event):

painter = QtGui.QPainter(self)
rect = self.contentsRect()

boardTop = rect.bottom() - Board.BoardHeight * self.squareHeight()

for i in range(Board.BoardHeight):
for j in range(Board.BoardWidth):
shape = self.shapeAt(j, Board.BoardHeight - i - 1)
if shape != Tetrominoes.NoShape:
self.drawSquare(painter,
rect.left() + j * self.squareWidth(),
boardTop + i * self.squareHeight(), shape)

if self.curPiece.shape() != Tetrominoes.NoShape:
for i in range(4):
x = self.curX + self.curPiece.x(i)
y = self.curY - self.curPiece.y(i)
self.drawSquare(painter, rect.left() + x * self.squareWidth(),
boardTop + (Board.BoardHeight - y - 1) * self.squareHeight(),
self.curPiece.shape())

def keyPressEvent(self, event):

if not self.isStarted or self.curPiece.shape() == Tetrominoes.NoShape:
QtGui.QWidget.keyPressEvent(self, event)
return

key = event.key()

if key == QtCore.Qt.Key_P:
self.pause()
return
if self.isPaused:
return
elif key == QtCore.Qt.Key_Left:
self.tryMove(self.curPiece, self.curX - 1, self.curY)
elif key == QtCore.Qt.Key_Right:
self.tryMove(self.curPiece, self.curX + 1, self.curY)
elif key == QtCore.Qt.Key_Down:
self.tryMove(self.curPiece.rotatedRight(), self.curX, self.curY)
elif key == QtCore.Qt.Key_Up:
self.tryMove(self.curPiece.rotatedLeft(), self.curX, self.curY)
elif key == QtCore.Qt.Key_Space:
self.dropDown()
elif key == QtCore.Qt.Key_D:
self.oneLineDown()
else:
QtGui.QWidget.keyPressEvent(self, event)

def timerEvent(self, event):

if event.timerId() == self.timer.timerId():
if self.isWaitingAfterLine:
self.isWaitingAfterLine = False
self.newPiece()
else:
self.oneLineDown()
else:
QtGui.QFrame.timerEvent(self, event)

def clearBoard(self):

for i in range(Board.BoardHeight * Board.BoardWidth):
self.board.append(Tetrominoes.NoShape)

def dropDown(self):

newY = self.curY
while newY > 0:
if not self.tryMove(self.curPiece, self.curX, newY - 1):
break
newY -= 1

self.pieceDropped()

def oneLineDown(self):

if not self.tryMove(self.curPiece, self.curX, self.curY - 1):
self.pieceDropped()

def pieceDropped(self):

for i in range(4):
x = self.curX + self.curPiece.x(i)
y = self.curY - self.curPiece.y(i)
self.setShapeAt(x, y, self.curPiece.shape())

self.removeFullLines()

if not self.isWaitingAfterLine:
self.newPiece()

def removeFullLines(self):
numFullLines = 0

rowsToRemove = []

for i in range(Board.BoardHeight):
n = 0
for j in range(Board.BoardWidth):
if not self.shapeAt(j, i) == Tetrominoes.NoShape:
n = n + 1

if n == 10:
rowsToRemove.append(i)

rowsToRemove.reverse()

for m in rowsToRemove:
for k in range(m, Board.BoardHeight):
for l in range(Board.BoardWidth):
self.setShapeAt(l, k, self.shapeAt(l, k + 1))

numFullLines = numFullLines + len(rowsToRemove)

if numFullLines > 0:
self.numLinesRemoved = self.numLinesRemoved + numFullLines
print self.numLinesRemoved
self.c.msgToSB.emit(str(self.numLinesRemoved))
self.isWaitingAfterLine = True
self.curPiece.setShape(Tetrominoes.NoShape)
self.update()

def newPiece(self):

self.curPiece = self.nextPiece
self.nextPiece.setRandomShape()
self.curX = Board.BoardWidth / 2 + 1
self.curY = Board.BoardHeight - 1 + self.curPiece.minY()

if not self.tryMove(self.curPiece, self.curX, self.curY):
self.curPiece.setShape(Tetrominoes.NoShape)
self.timer.stop()
self.isStarted = False
self.c.msgToSB.emit("Game over")

def tryMove(self, newPiece, newX, newY):

for i in range(4):
x = newX + newPiece.x(i)
y = newY - newPiece.y(i)
if x < 0 or x >= Board.BoardWidth or y < 0 or y >= Board.BoardHeight:
return False
if self.shapeAt(x, y) != Tetrominoes.NoShape:
return False

self.curPiece = newPiece
self.curX = newX
self.curY = newY
self.update()
return True

def drawSquare(self, painter, x, y, shape):

colorTable = [0x000000, 0xCC6666, 0x66CC66, 0x6666CC,
0xCCCC66, 0xCC66CC, 0x66CCCC, 0xDAAA00]

color = QtGui.QColor(colorTable[shape])
painter.fillRect(x + 1, y + 1, self.squareWidth() - 2,
self.squareHeight() - 2, color)

painter.setPen(color.lighter())
painter.drawLine(x, y + self.squareHeight() - 1, x, y)
painter.drawLine(x, y, x + self.squareWidth() - 1, y)

painter.setPen(color.darker())
painter.drawLine(x + 1, y + self.squareHeight() - 1,
x + self.squareWidth() - 1, y + self.squareHeight() - 1)
painter.drawLine(x + self.squareWidth() - 1,
y + self.squareHeight() - 1, x + self.squareWidth() - 1, y + 1)


class Tetrominoes(object):

NoShape = 0
ZShape = 1
SShape = 2
LineShape = 3
TShape = 4
SquareShape = 5
LShape = 6
MirroredLShape = 7


class Shape(object):

coordsTable = (
((0, 0), (0, 0), (0, 0), (0, 0)),
((0, -1), (0, 0), (-1, 0), (-1, 1)),
((0, -1), (0, 0), (1, 0), (1, 1)),
((0, -1), (0, 0), (0, 1), (0, 2)),
((-1, 0), (0, 0), (1, 0), (0, 1)),
((0, 0), (1, 0), (0, 1), (1, 1)),
((-1, -1), (0, -1), (0, 0), (0, 1)),
((1, -1), (0, -1), (0, 0), (0, 1))
)

def __init__(self):

self.coords = [[0,0] for i in range(4)]
self.pieceShape = Tetrominoes.NoShape

self.setShape(Tetrominoes.NoShape)

def shape(self):
return self.pieceShape

def setShape(self, shape):

table = Shape.coordsTable[shape]
for i in range(4):
for j in range(2):
self.coords[i][j] = table[i][j]

self.pieceShape = shape

def setRandomShape(self):
self.setShape(random.randint(1, 7))

def x(self, index):
return self.coords[index][0]

def y(self, index):
return self.coords[index][1]

def setX(self, index, x):
self.coords[index][0] = x

def setY(self, index, y):
self.coords[index][1] = y

def minX(self):

m = self.coords[0][0]
for i in range(4):
m = min(m, self.coords[i][0])

return m

def maxX(self):

m = self.coords[0][0]
for i in range(4):
m = max(m, self.coords[i][0])

return m

def minY(self):

m = self.coords[0][1]
for i in range(4):
m = min(m, self.coords[i][1])

return m

def maxY(self):

m = self.coords[0][1]
for i in range(4):
m = max(m, self.coords[i][1])

return m

def rotatedLeft(self):

if self.pieceShape == Tetrominoes.SquareShape:
return self

result = Shape()
result.pieceShape = self.pieceShape

for i in range(4):
result.setX(i, self.y(i))
result.setY(i, -self.x(i))

return result

def rotatedRight(self):

if self.pieceShape == Tetrominoes.SquareShape:
return self

result = Shape()
result.pieceShape = self.pieceShape

for i in range(4):
result.setX(i, -self.y(i))
result.setY(i, self.x(i))

return result

def main():

app = QtGui.QApplication(sys.argv)
t = Tetris()
t.show()
sys.exit(app.exec_())


if __name__ == '__main__':
main()
I have simplified the game a bit, so that it is easier to understand. The game starts immediately, after it is launched. We can pause the game by pressing the p key. The space key will drop the Tetris piece immediately to the bottom. The game goes at constant speed, no acceleration is implemented. The score is the number of lines, that we have removed.
self.statusbar = self.statusBar()
self.Tetrisboard.c.msgToSB[str].connect(self.statusbar.showMessage)
We create a statusbar, where we will display messages. We will display three possible messages. The number of lines alredy removed. The paused message and the game over message.
...
self.curX = 0
self.curY = 0
self.numLinesRemoved = 0
self.board = []
...
Before we start the game cycle, we initialize some important variables. The self.board variable is a list of numbers from 0 ... 7. It represents the position of various shapes and remains of the shapes on the board.
for j in range(Board.BoardWidth):
shape = self.shapeAt(j, Board.BoardHeight - i - 1)
if shape != Tetrominoes.NoShape:
self.drawSquare(painter,
rect.left() + j * self.squareWidth(),
boardTop + i * self.squareHeight(), shape)
The painting of the game is divided into two steps. In the first step, we draw all the shapes, or remains of the shapes, that have been dropped to the bottom of the board. All the squares are rememberd in the self.board list variable. We access it using the shapeAt() method.
if self.curPiece.shape() != Tetrominoes.NoShape:
for i in range(4):
x = self.curX + self.curPiece.x(i)
y = self.curY - self.curPiece.y(i)
self.drawSquare(painter, rect.left() + x * self.squareWidth(),
boardTop + (Board.BoardHeight - y - 1) * self.squareHeight(),
self.curPiece.shape())
The next step is drawing of the actual piece, that is falling down.
elif key == QtCore.Qt.Key_Left:
self.tryMove(self.curPiece, self.curX - 1, self.curY)
elif key == QtCore.Qt.Key_Right:
self.tryMove(self.curPiece, self.curX + 1, self.curY)
In the keyPressEvent we check for pressed keys. If we press the right arrow key, we try to move the piece to the right. We say try, because the piece might not be able to move.
def tryMove(self, newPiece, newX, newY):
for i in range(4):
x = newX + newPiece.x(i)
y = newY - newPiece.y(i)
if x < 0 or x >= Board.BoardWidth or y < 0 or y >= Board.BoardHeight:
return False
if self.shapeAt(x, y) != Tetrominoes.NoShape:
return False

self.curPiece = newPiece
self.curX = newX
self.curY = newY
self.update()
return True
In the tryMove() method we try to move our shapes. If the shape is at the edge of the board or is adjacent to some other piece, we return false. Otherwise we place the current falling piece to a new position.
def timerEvent(self, event):
if event.timerId() == self.timer.timerId():
if self.isWaitingAfterLine:
self.isWaitingAfterLine = False
self.newPiece()
else:
self.oneLineDown()
else:
QtGui.QFrame.timerEvent(self, event)
In the timer event, we either create a new piece, after the previous one was dropped to the bottom, or we move a falling piece one line down.
def removeFullLines(self):
numFullLines = 0

rowsToRemove = []

for i in range(Board.BoardHeight):
n = 0
for j in range(Board.BoardWidth):
if not self.shapeAt(j, i) == Tetrominoes.NoShape:
n = n + 1

if n == 10:
rowsToRemove.append(i)

rowsToRemove.reverse()

for m in rowsToRemove:
for k in range(m, Board.BoardHeight):
for l in range(Board.BoardWidth):
self.setShapeAt(l, k, self.shapeAt(l, k + 1))
...
If the piece hits the bottom, we call the removeFullLines() method. First we find out all full lines. And we remove them. We do it by moving all lines above the current full line to be removed one line down. Notice, that we reverse the order of the lines to be removed. Otherwise, it would not work correctly. In our case we use a naive gravity. This means, that the pieces may be floating above empty gaps.
def newPiece(self):

self.curPiece = self.nextPiece
self.nextPiece.setRandomShape()
self.curX = Board.BoardWidth / 2 + 1
self.curY = Board.BoardHeight - 1 + self.curPiece.minY()

if not self.tryMove(self.curPiece, self.curX, self.curY):
self.curPiece.setShape(Tetrominoes.NoShape)
self.timer.stop()
self.isStarted = False
self.c.msgToSB.emit("Game over")
The newPiece() method creates randomly a new Tetris piece. If the piece cannot go into it's initial position, the game is over.
The Shape class saves information about the Tetris piece.
self.coords = [[0,0] for i in range(4)]
Upon creation we create an empty coordinates list. The list will save the coordinates of the Tetris piece. For example, these tuples (0, -1), (0, 0), (1, 0), (1, 1) represent a rotated S-shape. The following diagram illustrates the shape.
Coordinates
Figure: Coordinates
When we draw the current falling piece, we draw it at self.curX, self.curY position. Then we look at the coordinates table and draw all the four squares.
Tetris
Figure: Tetris
This was a Tetris game in PySide.
Continue Reading

Custom Widgets in PySide

Custom Widgets in PySide

PySide is rich on various widgets. No toolkit can provide all widgets that programmers might need in their applications. Toolkits usually provide only the most common widgets like buttons, text widgets, sliders etc. If there is a need for a more specialized widget, we must create it ourselves.
Custom widgets are created by using the drawing tools provided by the toolkit. There are two possibilities. A programmer can modify or enhance an existing widget. Or he can create a custom widget from scratch.

Burning widget

This is a widget that we can see in Nero, K3B or other CD/DVD burning software. We create the widget completely from scratch. It is based on a minimal QtGui.QWidget widget.
#!/usr/bin/python
# -*- coding: utf-8 -*-

"""
ZetCode PySide tutorial

In this example, we create a custom widget.

author: Jan Bodnar
website: zetcode.com
last edited: August 2011
"""

import sys
from PySide import QtGui, QtCore

class Communicate(QtCore.QObject):

updateBW = QtCore.Signal(int)

class BurningWidget(QtGui.QWidget):

def __init__(self):
super(BurningWidget, self).__init__()

self.initUI()

def initUI(self):

self.setMinimumSize(1, 30)
self.value = 75
self.num = [75, 150, 225, 300, 375, 450, 525, 600, 675]


def setValue(self, value):

self.value = value


def paintEvent(self, e):

qp = QtGui.QPainter()
qp.begin(self)
self.drawWidget(qp)
qp.end()


def drawWidget(self, qp):

font = QtGui.QFont('Serif', 7, QtGui.QFont.Light)
qp.setFont(font)

size = self.size()
w = size.width()
h = size.height()

step = int(round(w / 10.0))


till = int(((w / 750.0) * self.value))
full = int(((w / 750.0) * 700))

if self.value >= 700:
qp.setPen(QtGui.QColor(255, 255, 255))
qp.setBrush(QtGui.QColor(255, 255, 184))
qp.drawRect(0, 0, full, h)
qp.setPen(QtGui.QColor(255, 175, 175))
qp.setBrush(QtGui.QColor(255, 175, 175))
qp.drawRect(full, 0, till-full, h)
else:
qp.setPen(QtGui.QColor(255, 255, 255))
qp.setBrush(QtGui.QColor(255, 255, 184))
qp.drawRect(0, 0, till, h)


pen = QtGui.QPen(QtGui.QColor(20, 20, 20), 1,
QtCore.Qt.SolidLine)

qp.setPen(pen)
qp.setBrush(QtCore.Qt.NoBrush)
qp.drawRect(0, 0, w-1, h-1)

j = 0

for i in range(step, 10*step, step):

qp.drawLine(i, 0, i, 5)
metrics = qp.fontMetrics()
fw = metrics.width(str(self.num[j]))
qp.drawText(i-fw/2, h/2, str(self.num[j]))
j = j + 1

class Example(QtGui.QWidget):

def __init__(self):
super(Example, self).__init__()

self.initUI()

def initUI(self):

sld = QtGui.QSlider(QtCore.Qt.Horizontal, self)
sld.setFocusPolicy(QtCore.Qt.NoFocus)
sld.setRange(1, 750)
sld.setValue(75)
sld.setGeometry(30, 40, 150, 30)

self.c = Communicate()
self.wid = BurningWidget()
self.c.updateBW[int].connect(self.wid.setValue)

sld.valueChanged[int].connect(self.changeValue)
hbox = QtGui.QHBoxLayout()
hbox.addWidget(self.wid)
vbox = QtGui.QVBoxLayout()
vbox.addStretch(1)
vbox.addLayout(hbox)
self.setLayout(vbox)

self.setGeometry(300, 300, 390, 210)
self.setWindowTitle('Burning widget')
self.show()

def changeValue(self, value):

self.c.updateBW.emit(value)
self.wid.repaint()

def main():

app = QtGui.QApplication(sys.argv)
ex = Example()
sys.exit(app.exec_())


if __name__ == '__main__':
main()
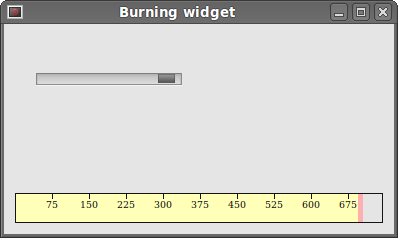
In our example, we have a QtGui.QSlider and a custom widget. The slider controls the custom widget. This widget shows graphically the total capacity of a medium and the free space available to us. The minimum value of our custom widget is 1, the maximum is 750. If we reach value 700, we begin drawing in red color. This normally indicates overburning.
The burning widget is placed at the bottom of the window. This is achieved using one QtGui.QHBoxLayout and one QtGui.QVBoxLayout
class BurningWidget(QtGui.QWidget):

def __init__(self):
super(BurningWidget, self).__init__()
The burning widget it based on the QtGui.QWidget widget.
self.setMinimumSize(1, 30)
We change the minimum size (height) of the widget. The default value is a bit small for us.
font = QtGui.QFont('Serif', 7, QtGui.QFont.Light)
qp.setFont(font)
We use a smaller font than the default one. That better suits our needs.
size = self.size()
w = size.width()
h = size.height()

step = int(round(w / 10.0))


till = int(((w / 750.0) * self.value))
full = int(((w / 750.0) * 700))
We draw the widget dynamically. The greater the window, the greater the burning widget. And vice versa. That is why we must calculate the size of the widget onto which we draw the custom widget. The till parameter determines the total size to be drawn. This value comes from the slider widget. It is a proportion of the whole area. The full parameter determines the point, where we begin to draw in red color. Notice the use of floating point arithmetics. This is to achieve greater precision.
The actual drawing consists of three steps. We draw the yellow or red and yellow rectangle. Then we draw the vertical lines, which divide the widget into several parts. Finally, we draw the numbers, which indicate the capacity of the medium.
metrics = qp.fontMetrics()
fw = metrics.width(str(self.num[j]))
qp.drawText(i-fw/2, h/2, str(self.num[j]))
We use font metrics to draw the text. We must know the width of the text in order to center it around the vertical line.
def changeValue(self, value):

self.c.updateBW.emit(value)
self.wid.repaint()
When we move the slider, the changeValue() method is called. Inside the method, we send a custom updateBW signal with a parameter. The parameter is the current value of the slider. The value is later used to calculate the capacity of the Burning widget to be drawn. The custom widget is then repainted.
The Burning widget
Figure: The Burning widget
In this part of the PySide tutorial, we created a custom widget.
Continue Reading

Drawing in PySide

Drawing in PySide

Drawing is used, when we want to change or enhance an existing widget. Or if we are creating a custom widget from scratch. To do the drawing, we use the drawing API provided by the PySide toolkit.
The drawing is done within the paintEvent() method. The drawing code is placed between the begin() and end() methods of the QtGui.QPainter object.

Drawing text

We begin with drawing some Unicode text onto the window client area.
#!/usr/bin/python
# -*- coding: utf-8 -*-

"""
ZetCode PySide tutorial

In this example, we draw text in Russian azbuka.

author: Jan Bodnar
website: zetcode.com
last edited: August 2011
"""

import sys
from PySide import QtGui, QtCore

class Example(QtGui.QWidget):

def __init__(self):
super(Example, self).__init__()

self.initUI()

def initUI(self):

self.text = u'\u041b\u0435\u0432 \u041d\u0438\u043a\u043e\u043b\u0430\
\u0435\u0432\u0438\u0447 \u0422\u043e\u043b\u0441\u0442\u043e\u0439: \n\
\u0410\u043d\u043d\u0430 \u041a\u0430\u0440\u0435\u043d\u0438\u043d\u0430'

self.setGeometry(300, 300, 280, 170)
self.setWindowTitle('Draw text')
self.show()

def paintEvent(self, event):

qp = QtGui.QPainter()
qp.begin(self)
self.drawText(event, qp)
qp.end()

def drawText(self, event, qp):

qp.setPen(QtGui.QColor(168, 34, 3))
qp.setFont(QtGui.QFont('Decorative', 10))
qp.drawText(event.rect(), QtCore.Qt.AlignCenter, self.text)


def main():

app = QtGui.QApplication(sys.argv)
ex = Example()
sys.exit(app.exec_())


if __name__ == '__main__':
main()
In our example, we draw some text in Azbuka. The text is vertically and horizontally aligned.
def paintEvent(self, event):
Drawing is done within a paint event.
qp = QtGui.QPainter()
qp.begin(self)
self.drawText(event, qp)
qp.end()
The QtGui.QPainter class is responsible for all the low-level painting. All the painting methods go between begin()and end() methods. The actual painting is delegated to the drawText() method.
qp.setPen(QtGui.QColor(168, 34, 3))
qp.setFont(QtGui.QFont('Decorative', 10))
Here we define pen and font, which we use to draw the text.
qp.drawText(event.rect(), QtCore.Qt.AlignCenter, self.text)
The drawText() method draws text on the window. The rect() method of the paint event returns the rectangle that needs to be updated.
Drawing Text
Figure: Drawing Text

Drawing points

A point is the most simple graphics object, that can be drawn. It is a small spot on the window.
#!/usr/bin/python
# -*- coding: utf-8 -*-

"""
ZetCode PySide tutorial

In the example, we draw randomly 1000 red points
on the window.

author: Jan Bodnar
website: zetcode.com
last edited: August 2011
"""

import sys, random
from PySide import QtGui, QtCore

class Example(QtGui.QWidget):

def __init__(self):
super(Example, self).__init__()

self.initUI()

def initUI(self):

self.setGeometry(300, 300, 280, 170)
self.setWindowTitle('Points')
self.show()

def paintEvent(self, e):

qp = QtGui.QPainter()
qp.begin(self)
self.drawPoints(qp)
qp.end()

def drawPoints(self, qp):

qp.setPen(QtCore.Qt.red)
size = self.size()

for i in range(1000):
x = random.randint(1, size.width()-1)
y = random.randint(1, size.height()-1)
qp.drawPoint(x, y)


def main():

app = QtGui.QApplication(sys.argv)
ex = Example()
sys.exit(app.exec_())


if __name__ == '__main__':
main()
In our example, we draw randomly 1000 red points on the client area.
qp.setPen(QtCore.Qt.red)
We set the pen to red color. We use a predefined color constant.
size = self.size()
Each time we resize the window, a paint event is generated. We get the current size of the window with the size() method. We use the size of the window to distribute the points all over the client area of the window.
qp.drawPoint(x, y) 
We draw the point with the drawPoint() method.
Points
Figure: Points

Colors

A color is an object representing a combination of Red, Green, and Blue (RGB) intensity values. Valid RGB values are in the range 0 to 255. We can define a color in various ways. The most common are RGB decimal values or hexadecimal values. We can also use an RGBA value, which stands for Red, Green, Blue, Alpha. Here we add some extra information, regarding transparency. Alpha value of 255 defines full opacity, 0 is for full transparency, e.g. the color is invisible.
#!/usr/bin/python
# -*- coding: utf-8 -*-

"""
ZetCode PySide tutorial

This example draws three rectangles in three
different colors.

author: Jan Bodnar
website: zetcode.com
last edited: August 2011
"""

import sys
from PySide import QtGui, QtCore

class Example(QtGui.QWidget):

def __init__(self):
super(Example, self).__init__()

self.initUI()

def initUI(self):

self.setGeometry(300, 300, 350, 100)
self.setWindowTitle('Colors')
self.show()

def paintEvent(self, e):

qp = QtGui.QPainter()
qp.begin(self)
self.drawRectangles(qp)
qp.end()

def drawRectangles(self, qp):

color = QtGui.QColor(0, 0, 0)
color.setNamedColor('#d4d4d4')
qp.setPen(color)

qp.setBrush(QtGui.QColor(200, 0, 0))
qp.drawRect(10, 15, 90, 60)

qp.setBrush(QtGui.QColor(255, 80, 0, 160))
qp.drawRect(130, 15, 90, 60)

qp.setBrush(QtGui.QColor(25, 0, 90, 200))
qp.drawRect(250, 15, 90, 60)


def main():

app = QtGui.QApplication(sys.argv)
ex = Example()
sys.exit(app.exec_())


if __name__ == '__main__':
main()
In our example, we draw 3 colored rectangles.
color = QtGui.QColor(0, 0, 0)
color.setNamedColor('#d4d4d4')
Here we define a color using a hexadecimal notation.
qp.setPen(color)
The above defined color is used for pen, which is used to draw outlines of shapes.
qp.setBrush(QtGui.QColor(200, 0, 0))
qp.drawRect(10, 15, 90, 60)
Here we define a brush and draw a rectangle. A brush is an elementary graphics object, which is used to draw the background of a shape. The drawRect() method accepts four parameters. The first two are x, y values on the axis. The third and fourth parameters are width and height of the rectangle. The method draws a rectangle using current pen and current brush.
Colors
Figure: Colors

QtGui.QPen

QtGui.QPen is an elementary graphics object. It is used to draw lines, curves and outlines of rectangles, ellipses, polygons or other shapes.
#!/usr/bin/python
# -*- coding: utf-8 -*-

"""
ZetCode PySide tutorial

This example draws three rectangles in three
different colors.

author: Jan Bodnar
website: zetcode.com
last edited: August 2011
"""

import sys
from PySide import QtGui, QtCore

class Example(QtGui.QWidget):

def __init__(self):
super(Example, self).__init__()

self.initUI()

def initUI(self):

self.setGeometry(300, 300, 280, 270)
self.setWindowTitle('Pen styles')
self.show()

def paintEvent(self, e):

qp = QtGui.QPainter()
qp.begin(self)
self.drawLines(qp)
qp.end()

def drawLines(self, qp):

pen = QtGui.QPen(QtCore.Qt.black, 2, QtCore.Qt.SolidLine)

qp.setPen(pen)
qp.drawLine(20, 40, 250, 40)

pen.setStyle(QtCore.Qt.DashLine)
qp.setPen(pen)
qp.drawLine(20, 80, 250, 80)

pen.setStyle(QtCore.Qt.DashDotLine)
qp.setPen(pen)
qp.drawLine(20, 120, 250, 120)

pen.setStyle(QtCore.Qt.DotLine)
qp.setPen(pen)
qp.drawLine(20, 160, 250, 160)

pen.setStyle(QtCore.Qt.DashDotDotLine)
qp.setPen(pen)
qp.drawLine(20, 200, 250, 200)

pen.setStyle(QtCore.Qt.CustomDashLine)
pen.setDashPattern([1, 4, 5, 4])
qp.setPen(pen)
qp.drawLine(20, 240, 250, 240)


def main():

app = QtGui.QApplication(sys.argv)
ex = Example()
sys.exit(app.exec_())


if __name__ == '__main__':
main()
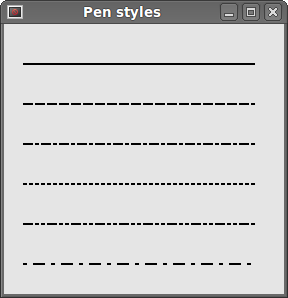
In our example, we draw six lines. The lines are drawn in six different pen styles. There are five predefined pen styles. We can create also custom pen styles. The last line is drawn using custom pen style.
pen = QtGui.QPen(QtCore.Qt.black, 2, QtCore.Qt.SolidLine)
We create a QtGui.QPen object. The color is black. The width is set to 2 pixels, so that we can see the differences between the pen styles. The QtCore.Qt.SolidLine is one of the predefined pen styles.
pen.setStyle(QtCore.Qt.CustomDashLine)
pen.setDashPattern([1, 4, 5, 4])
qp.setPen(pen)
Here we define a custom pen style. We set a QtCore.Qt.CustomDashLinepen style and call a setDashPattern() method. The list of numbers defines a style. There must be an even number of numbers. Odd numbers define a dash, even numbers space. The greater the number, the greater the space or the dash. Our pattern is 1px dash 4px space 5px dash 4px space etc.
Pen Styles
Figure: Pen Styles

QtGui.QBrush

QtGui.QBrush is an elementary graphics object. It is used to paint the background of graphics shapes, such as rectangles, ellipses or polygons. A brush can be of three different types. A predefined brush a gradient or a texture pattern.
#!/usr/bin/python
# -*- coding: utf-8 -*-

"""
ZetCode PySide tutorial

This example draws 9 rectangles in different
brush styles.

author: Jan Bodnar
website: zetcode.com
last edited: August 2011
"""

import sys
from PySide import QtGui, QtCore

class Example(QtGui.QWidget):

def __init__(self):
super(Example, self).__init__()

self.initUI()

def initUI(self):

self.setGeometry(300, 300, 355, 280)
self.setWindowTitle('Brushes')
self.show()

def paintEvent(self, e):

qp = QtGui.QPainter()
qp.begin(self)
self.drawBrushes(qp)
qp.end()

def drawBrushes(self, qp):

brush = QtGui.QBrush(QtCore.Qt.SolidPattern)
qp.setBrush(brush)
qp.drawRect(10, 15, 90, 60)

brush.setStyle(QtCore.Qt.Dense1Pattern)
qp.setBrush(brush)
qp.drawRect(130, 15, 90, 60)

brush.setStyle(QtCore.Qt.Dense2Pattern)
qp.setBrush(brush)
qp.drawRect(250, 15, 90, 60)

brush.setStyle(QtCore.Qt.Dense3Pattern)
qp.setBrush(brush)
qp.drawRect(10, 105, 90, 60)

brush.setStyle(QtCore.Qt.DiagCrossPattern)
qp.setBrush(brush)
qp.drawRect(10, 105, 90, 60)

brush.setStyle(QtCore.Qt.Dense5Pattern)
qp.setBrush(brush)
qp.drawRect(130, 105, 90, 60)

brush.setStyle(QtCore.Qt.Dense6Pattern)
qp.setBrush(brush)
qp.drawRect(250, 105, 90, 60)

brush.setStyle(QtCore.Qt.HorPattern)
qp.setBrush(brush)
qp.drawRect(10, 195, 90, 60)

brush.setStyle(QtCore.Qt.VerPattern)
qp.setBrush(brush)
qp.drawRect(130, 195, 90, 60)

brush.setStyle(QtCore.Qt.BDiagPattern)
qp.setBrush(brush)
qp.drawRect(250, 195, 90, 60)


def main():

app = QtGui.QApplication(sys.argv)
ex = Example()
sys.exit(app.exec_())


if __name__ == '__main__':
main()
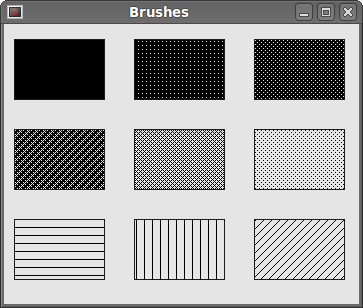
In our example, we draw nine different rectangles using 9 different brush styles.
brush = QtGui.QBrush(QtCore.Qt.SolidPattern)
qp.setBrush(brush)
qp.drawRect(10, 15, 90, 60)
We define a brush object. Set it to the painter object. And draw the rectangle calling the drawRect() method. It is the first rectangle shown on the picture.
Brushes
Figure: Brushes
In this part of the PySide tutorial, we did some basic painting.
Continue Reading

Drag and Drop in PySide

Drag and Drop in PySide

In this part of the PySide tutorial, we will talk about drag & drop operations.
In computer graphical user interfaces, drag-and-drop is the action of (or support for the action of) clicking on a virtual object and dragging it to a different location or onto another virtual object. In general, it can be used to invoke many kinds of actions, or create various types of associations between two abstract objects. (Wikipedia)
Drag and drop functionality is one of the most visible aspects of the graphical user interface. Drag and drop operation enables users to do complex things intuitively.
Usually, we can drag and drop two things. Data or some graphical objects. If we drag an image from one application to another, we drag and drop binary data. If we drag a tab in Firefox and move it to another place, we drag and drop a graphical component.

Simple Drag and Drop

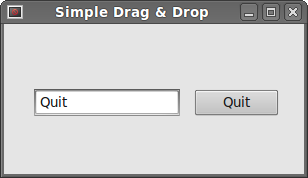
In the first example, we will have a QtGui.QLineEdit and a QtGui.QPushButton. We will drag plain text from the line edit widget and drop it onto the button widget.
#!/usr/bin/python
# -*- coding: utf-8 -*-

"""
ZetCode PySide tutorial

This is a simple drag and
drop example.

author: Jan Bodnar
website: zetcode.com
last edited: August 2011
"""

import sys
from PySide import QtGui, QtCore

class Button(QtGui.QPushButton):

def __init__(self, title, parent):
super(Button, self).__init__(title, parent)

self.setAcceptDrops(True)

def dragEnterEvent(self, e):

if e.mimeData().hasFormat('text/plain'):
e.accept()
else:
e.ignore()

def dropEvent(self, e):
self.setText(e.mimeData().text())


class Example(QtGui.QWidget):

def __init__(self):
super(Example, self).__init__()

self.initUI()

def initUI(self):

qe = QtGui.QLineEdit('', self)
qe.setDragEnabled(True)
qe.move(30, 65)

button = Button("Button", self)
button.move(190, 65)

self.setGeometry(300, 300, 300, 150)
self.setWindowTitle('Simple Drag & Drop')
self.show()

def main():

app = QtGui.QApplication(sys.argv)
ex = Example()
sys.exit(app.exec_())


if __name__ == '__main__':
main()
Simple drag & drop operation.
class Button(QtGui.QPushButton):

def __init__(self, title, parent):
super(Button, self).__init__(title, parent)
In order to drop text on the QtGui.QPushButton widget, we must reimplement some methods. So we create our own Button class, which will inherit from the QtGui.QPushButton class.
self.setAcceptDrops(True)
We enable drop events for the widget.
def dragEnterEvent(self, e):

if e.mimeData().hasFormat('text/plain'):
e.accept()
else:
e.ignore()
First we reimplement the dragEnterEvent() method. We inform about the data type, we will accept. In our case it is plain text.
def dropEvent(self, e):
self.setText(e.mimeData().text())
By reimplementing the dropEvent() method, we will define, what we will do upon the drop event. Here we change the text of the button widget.
qe = QtGui.QLineEdit('', self)
qe.setDragEnabled(True)
The QtGui.QLineEdit widget has a built-in support for drag operations. All we need to do is to call setDragEnabled() method to activate it.
Simple Drag & Drop
Figure: Simple Drag & Drop

Drag & drop a button widget

In the following example, we will demonstrate, how to drag & drop a button widget.
#!/usr/bin/python
# -*- coding: utf-8 -*-

"""
ZetCode PySide tutorial

In this example, we drag and drop a
button.

author: Jan Bodnar
website: zetcode.com
last edited: August 2011
"""

import sys
from PySide import QtGui, QtCore

class Button(QtGui.QPushButton):

def __init__(self, title, parent):
super(Button, self).__init__(title, parent)

def mouseMoveEvent(self, e):

if e.buttons() != QtCore.Qt.RightButton:
return

mimeData = QtCore.QMimeData()

drag = QtGui.QDrag(self)
drag.setMimeData(mimeData)
drag.setHotSpot(e.pos() - self.rect().topLeft())

dropAction = drag.start(QtCore.Qt.MoveAction)


def mousePressEvent(self, e):

QtGui.QPushButton.mousePressEvent(self, e)
if e.button() == QtCore.Qt.LeftButton:
print 'press'


class Example(QtGui.QWidget):

def __init__(self):
super(Example, self).__init__()

self.initUI()

def initUI(self):

self.setAcceptDrops(True)

self.btn = Button('Button', self)
self.btn.move(100, 65)

self.setGeometry(300, 300, 300, 150)
self.setWindowTitle('Click or move')
self.show()

def dragEnterEvent(self, e):

e.accept()

def dropEvent(self, e):

position = e.pos()
self.btn.move(position)

e.setDropAction(QtCore.Qt.MoveAction)
e.accept()

def main():

app = QtGui.QApplication(sys.argv)
ex = Example()
sys.exit(app.exec_())


if __name__ == '__main__':
main()
In our code example, we have a QtGui.QPushButton on the window. If we click on the button with a left mouse button, we print 'press' to the console. By right clicking and moving the button, we perform a drag & drop operation on the button widget.
class Button(QtGui.QPushButton):

def __init__(self, title, parent):
super(Button, self).__init__(title, parent)
We create a Button class, which will derive from the QtGui.QPushButton. We also reimplement two methods of the QtGui.QPushButton, the mouseMoveEvent() and mousePressEvent(). The mouseMoveEvent() method is the place, where the drag & drop operation begins.
if event.buttons() != QtCore.Qt.RightButton:
return
Here we decide, that we can perform drag & drop only with a right mouse button. The left mouse button is reserved for clicking on the button.
mimeData = QtCore.QMimeData()

drag = QtGui.QDrag(self)
drag.setMimeData(mimeData)
drag.setHotSpot(event.pos() - self.rect().topLeft())
Here we create a QtGui.QDrag object.
dropAction = drag.start(QtCore.Qt.MoveAction)
The start() method of the drag object starts the drag & drop operation.
def mousePressEvent(self, e):

QtGui.QPushButton.mousePressEvent(self, e)
if e.button() == QtCore.Qt.LeftButton:
print 'press'
We print 'press' to the console, if we left click on the button with the mouse. Notice that we call mousePressEvent() method on the parent as well. Otherwise we would not see the button being pushed.
position = e.pos()

self.btn.move(position)
In the dropEvent() method we code, what happens after we release the mouse button and finish the drop operation. We find out the current mouse pointer position and move a button accordingly.
e.setDropAction(QtCore.Qt.MoveAction)
e.accept()
We specify the type of the drop action. In our case it is a move action.
This part of the PySide tutorial was dedicated to drag and drop.
Continue Reading

Continues covering PySide Widgets

PySide Widgets II

Here we will continue introducing PySide widgets. We will cover QtGui.QPixmap, QtGui.QLineEdit, QtGui.QSplitter and QtGui.QComboBox.

QtGui.QPixmap

QtGui.QPixmap is one of the widgets used to work with images. It is optimized for showing images on screen. In our code example, we will use QtGui.QPixmap to display an image on the window.
#!/usr/bin/python
# -*- coding: utf-8 -*-

"""
ZetCode PySide tutorial

In this example, we dispay an image
on the window.

author: Jan Bodnar
website: zetcode.com
last edited: August 2011
"""

import sys
from PySide import QtGui, QtCore

class Example(QtGui.QWidget):

def __init__(self):
super(Example, self).__init__()

self.initUI()

def initUI(self):

hbox = QtGui.QHBoxLayout(self)
pixmap = QtGui.QPixmap("redrock.png")

lbl = QtGui.QLabel(self)
lbl.setPixmap(pixmap)

hbox.addWidget(lbl)
self.setLayout(hbox)

self.setGeometry(300, 300, 280, 170)
self.setWindowTitle('Red Rock')
self.show()

def main():

app = QtGui.QApplication(sys.argv)
ex = Example()
sys.exit(app.exec_())


if __name__ == '__main__':
main()
In our example, we display an image on the window. We use a QtGui.QPixmap to load an image from a file and QtGui.QLabel widget to display the image on the window.
pixmap = QtGui.QPixmap("redrock.png")
We create a QtGui.QPixmap object. It takes the name of the file as a parameter.
lbl = QtGui.QLabel(self)
lbl.setPixmap(pixmap)
We put the pixmap into the QtGui.QLabel widget.

QtGui.QLineEdit

QtGui.QLineEdit is a widget that allows to enter and edit a single line of plain text. There are undo/redo, cut/paste and drag & drop functions available for QtGui.QLineEdit widget.
#!/usr/bin/python
# -*- coding: utf-8 -*-

"""
ZetCode PySide tutorial

This example shows text which
is entered in a QtGui.QLineEdit
in a QtGui.QLabel widget.

author: Jan Bodnar
website: zetcode.com
last edited: August 2011
"""

import sys
from PySide import QtGui, QtCore

class Example(QtGui.QWidget):

def __init__(self):
super(Example, self).__init__()

self.initUI()

def initUI(self):

self.lbl = QtGui.QLabel(self)
qle = QtGui.QLineEdit(self)

qle.move(60, 100)
self.lbl.move(60, 40)

qle.textChanged[str].connect(self.onChanged)

self.setGeometry(300, 300, 280, 170)
self.setWindowTitle('QtGui.QLineEdit')
self.show()

def onChanged(self, text):

self.lbl.setText(text)
self.lbl.adjustSize()


def main():

app = QtGui.QApplication(sys.argv)
ex = Example()
sys.exit(app.exec_())


if __name__ == '__main__':
main()

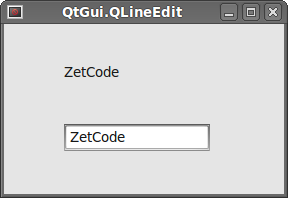
This example shows a line edit widget and a label. The text that we key in the line edit is displayed immediately in the label widget.
qle = QtGui.QLineEdit(self)
The QtGui.QLineEdit widget is created.
qle.textChanged[str].connect(self.onChanged)
If the text in the line edit widget changes, we call the onChanged() method.
def onChanged(self, text):

self.lbl.setText(text)
self.lbl.adjustSize()
Inside the onChanged() method, we set the typed text to the label widget. We call the adjustSize() method to adjust the size of the label to the length of the text.
QtGui.QLineEdit
Figure: QtGui.QLineEdit

QtGui.QSplitter

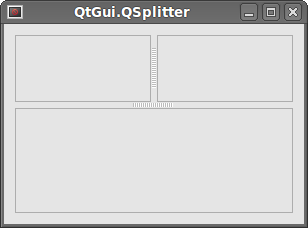
QtGui.QSplitter lets the user control the size of child widgets by dragging the boundary between the children. In our example, we show three QtGui.QFrame widgets organized with two splitters.
#!/usr/bin/python
# -*- coding: utf-8 -*-

"""
ZetCode PySide tutorial

This example shows
how to use QtGui.QSplitter widget.

author: Jan Bodnar
website: zetcode.com
last edited: August 2011
"""

import sys
from PySide import QtGui, QtCore

class Example(QtGui.QWidget):

def __init__(self):
super(Example, self).__init__()

self.initUI()

def initUI(self):

hbox = QtGui.QHBoxLayout(self)

topleft = QtGui.QFrame(self)
topleft.setFrameShape(QtGui.QFrame.StyledPanel)

topright = QtGui.QFrame(self)
topright.setFrameShape(QtGui.QFrame.StyledPanel)

bottom = QtGui.QFrame(self)
bottom.setFrameShape(QtGui.QFrame.StyledPanel)

splitter1 = QtGui.QSplitter(QtCore.Qt.Horizontal)
splitter1.addWidget(topleft)
splitter1.addWidget(topright)

splitter2 = QtGui.QSplitter(QtCore.Qt.Vertical)
splitter2.addWidget(splitter1)
splitter2.addWidget(bottom)

hbox.addWidget(splitter2)
self.setLayout(hbox)
QtGui.QApplication.setStyle(QtGui.QStyleFactory.create('Cleanlooks'))

self.setGeometry(300, 300, 300, 200)
self.setWindowTitle('QtGui.QSplitter')
self.show()

def onChanged(self, text):

self.lbl.setText(text)
self.lbl.adjustSize()


def main():

app = QtGui.QApplication(sys.argv)
ex = Example()
sys.exit(app.exec_())


if __name__ == '__main__':
main()
In our example we have three frame widgets and two splitters.
topleft = QtGui.QFrame(self)
topleft.setFrameShape(QtGui.QFrame.StyledPanel)
We use a styled frame in order to see boundaries between the QtGui.QFrame widgets.
splitter1 = QtGui.QSplitter(QtCore.Qt.Horizontal)
splitter1.addWidget(topleft)
splitter1.addWidget(topright)
We create a QtGui.QSplitter widget and add two frames into it.
splitter2 = QtGui.QSplitter(QtCore.Qt.Vertical)
splitter2.addWidget(splitter1)
We can also add splitter to another splitter widget.
QtGui.QApplication.setStyle(QtGui.QStyleFactory.create('Cleanlooks'))
We use a Cleanlooks style. In some styles the frames are not visible.
QtGui.QSplitter widget
Figure: QtGui.QSplitter widget

QtGui.QComboBox

The QtGui.QComboBox is a widget that allows the user to choose from a list of options.
#!/usr/bin/python
# -*- coding: utf-8 -*-

"""
ZetCode PySide tutorial

This example shows
how to use QtGui.QComboBox widget.

author: Jan Bodnar
website: zetcode.com
last edited: August 2011
"""

import sys
from PySide import QtGui, QtCore

class Example(QtGui.QWidget):

def __init__(self):
super(Example, self).__init__()

self.initUI()

def initUI(self):

self.lbl = QtGui.QLabel("Ubuntu", self)

combo = QtGui.QComboBox(self)
combo.addItem("Ubuntu")
combo.addItem("Mandriva")
combo.addItem("Fedora")
combo.addItem("Red Hat")
combo.addItem("Gentoo")

combo.move(50, 50)
self.lbl.move(50, 150)

combo.activated[str].connect(self.onActivated)

self.setGeometry(300, 300, 300, 200)
self.setWindowTitle('QtGui.QComboBox')
self.show()

def onActivated(self, text):

self.lbl.setText(text)
self.lbl.adjustSize()

def main():

app = QtGui.QApplication(sys.argv)
ex = Example()
sys.exit(app.exec_())


if __name__ == '__main__':
main()
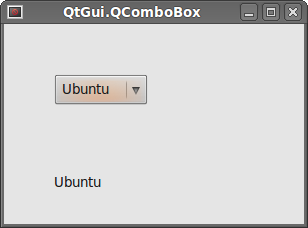
The example shows a QtGui.QComboBox and a QtGui.QLabel. The combo box has a list of five options. These are the names of Linux distros. The label widget shows the selected option from the combo box.
combo = QtGui.QComboBox(self)
combo.addItem("Ubuntu")
combo.addItem("Mandriva")
combo.addItem("Fedora")
combo.addItem("Red Hat")
combo.addItem("Gentoo")
We create a QtGui.QComboBox widget and add five options into it.
combo.activated[str].connect(self.onActivated)  
Upon an item selection, we call the onActivated() method.
def onActivated(self, text):

self.lbl.setText(text)
self.lbl.adjustSize()
Inside the method, we set the text of the chosen item to the label widget. We adjust the size of the label.
QtGui.QComboBox
Figure: QtGui.QComboBox
In this part of the PySide tutorial, we covered other four PySide widgets.
Continue Reading

PySide Widgets

PySide Widgets

Widgets are basic building blocks of an application. The PySide programming toolkit has a wide range of various widgets. Buttons, check boxes, sliders, list boxes etc. Everything a programmer needs for his job. In this section of the tutorial, we will describe several useful widgets. Namely QtGui.QCheckBox, ToggleButton, QtGui.QSlider, QtGui.QProgressBar and a QtGui.QCalendarWidget.

QtGui.QCheckBox

QtGui.QCheckBox is a widget that has two states. On and Off. It is a box with a label. Checkboxes are typically used to represent features in an application that can be enabled or disabled without affecting others.
#!/usr/bin/python
# -*- coding: utf-8 -*-

"""
ZetCode PySide tutorial

In this example, a QtGui.QCheckBox widget
is used to toggle the title of a window.

author: Jan Bodnar
website: zetcode.com
last edited: August 2011
"""

import sys
from PySide import QtGui, QtCore

class Example(QtGui.QWidget):

def __init__(self):
super(Example, self).__init__()

self.initUI()

def initUI(self):

cb = QtGui.QCheckBox('Show title', self)
cb.move(20, 20)
cb.toggle()
cb.stateChanged.connect(self.changeTitle)

self.setGeometry(300, 300, 250, 150)
self.setWindowTitle('QtGui.QCheckBox')
self.show()

def changeTitle(self, state):

if state == QtCore.Qt.Checked:
self.setWindowTitle('Checkbox')
else:
self.setWindowTitle('')

def main():

app = QtGui.QApplication(sys.argv)
ex = Example()
sys.exit(app.exec_())


if __name__ == '__main__':
main()

In our example, we will create a checkbox that will toggle the window title.
cb = QtGui.QCheckBox('Show title', self)
This is the QtGui.QCheckBox constructor.
cb.toggle()
We set the window title, so we must also check the checkbox.
cb.stateChanged.connect(self.changeTitle)
We connect the user defined changeTitle() method to the stateChanged signal. The changeTitle() method will toggle the window title.
def changeTitle(self, state):

if state == QtCore.Qt.Checked:
self.setWindowTitle('Checkbox')
else:
self.setWindowTitle('')
We receive the state of the check box in the state variable. If it is set, we set a title of the window. Otherwise, we use an empty string as a title.
QtGui.QCheckBox
Figure: QtGui.QCheckBox

ToggleButton

PySide has no widget for a ToggleButton. To create a ToggleButton, we use a QtGui.QPushButton in a special mode. ToggleButton is a button that has two states. Pressed and not pressed. You toggle between these two states by clicking on it. There are situations where this functionality fits well.
#!/usr/bin/python
# -*- coding: utf-8 -*-

"""
ZetCode PySide tutorial

In this example, we create three toggle buttons.
They will control the background color of a
QtGui.QFrame.

author: Jan Bodnar
website: zetcode.com
last edited: August 2011
"""

import sys
from PySide import QtGui, QtCore

class Example(QtGui.QWidget):

def __init__(self):
super(Example, self).__init__()

self.initUI()

def initUI(self):

self.col = QtGui.QColor(0, 0, 0)

redb = QtGui.QPushButton('Red', self)
redb.setCheckable(True)
redb.move(10, 10)

redb.clicked[bool].connect(self.setColor)

greenb = QtGui.QPushButton('Green', self)
greenb.setCheckable(True)
greenb.move(10, 60)

greenb.clicked[bool].connect(self.setColor)

blueb = QtGui.QPushButton('Blue', self)
blueb.setCheckable(True)
blueb.move(10, 110)

blueb.clicked[bool].connect(self.setColor)

self.square = QtGui.QFrame(self)
self.square.setGeometry(150, 20, 100, 100)
self.square.setStyleSheet("QWidget { background-color: %s }" %
self.col.name())

self.setGeometry(300, 300, 280, 170)
self.setWindowTitle('Toggle button')
self.show()

def setColor(self, pressed):

source = self.sender()

if pressed:
val = 255
else: val = 0

if source.text() == "Red":
self.col.setRed(val)
elif source.text() == "Green":
self.col.setGreen(val)
else:
self.col.setBlue(val)

self.square.setStyleSheet("QFrame { background-color: %s }" %
self.col.name())

def main():

app = QtGui.QApplication(sys.argv)
ex = Example()
sys.exit(app.exec_())


if __name__ == '__main__':
main()
In our example, we create three ToggleButtons. We also create a QtGui.QFrame widget. We set the background color of the widget to black. The togglebuttons will toggle the red, green and blue parts of a color value. The background color will depend on which togglebuttons we have pressed.
self.col = QtGui.QColor(0, 0, 0)  
This is the initial color value. It is black.
greenb = QtGui.QPushButton('Green', self)
greenb.setCheckable(True)
To create a ToggleButton, we create a QtGui.QPushButton and make it checkable by calling the setCheckable() method.
greenb.clicked[bool].connect(self.setColor)
We connect a clicked[bool] signal to our user defined method. Note that this signal type sends a bool argument to the method. The argument value is true or false, depending on the state of the button, e.g. if it is checked/toggled or not.
source = self.sender()
We get the sender of the signal. It is the button, which was toggled.
if source.text() == "Red":
self.col.setRed(val)
In case it was a red button, we update the red part of the color accordingly.
self.square.setStyleSheet("QFrame { background-color: %s }" %
self.col.name())
We use stylesheets to change the background color of the QtGui.QFramewidget.
ToggleButton
Figure: ToggleButton

QtGui.QSlider

QtGui.QSlider is a widget that has a simple handle. This handle can be pulled back and forth. This way we are choosing a value for a specific task. Sometimes using a slider is more natural, than simply providing a number or using a spin box. QtGui.QLabel displays text or image.
In our example we will show one slider and one label. This time, the label will display an image. The slider will control the label.
#!/usr/bin/python
# -*- coding: utf-8 -*-

"""
ZetCode PySide tutorial

This example shows a QtGui.QSlider widget.

author: Jan Bodnar
website: zetcode.com
last edited: August 2011
"""

import sys
from PySide import QtGui, QtCore

class Example(QtGui.QWidget):

def __init__(self):
super(Example, self).__init__()

self.initUI()

def initUI(self):

sld = QtGui.QSlider(QtCore.Qt.Horizontal, self)
sld.setFocusPolicy(QtCore.Qt.NoFocus)
sld.setGeometry(30, 40, 100, 30)
sld.valueChanged[int].connect(self.changeValue)

self.label = QtGui.QLabel(self)
self.label.setPixmap(QtGui.QPixmap('mute.png'))
self.label.setGeometry(160, 40, 80, 30)

self.setGeometry(300, 300, 280, 170)
self.setWindowTitle('QtGui.QSlider')
self.show()

def changeValue(self, value):

if value == 0:
self.label.setPixmap(QtGui.QPixmap('mute.png'))
elif value > 0 and value <= 30:
self.label.setPixmap(QtGui.QPixmap('min.png'))
elif value > 30 and value < 80:
self.label.setPixmap(QtGui.QPixmap('med.png'))
else:
self.label.setPixmap(QtGui.QPixmap('max.png'))

def main():

app = QtGui.QApplication(sys.argv)
ex = Example()
sys.exit(app.exec_())


if __name__ == '__main__':
main()

In our example we simulate a volume control. By dragging the handle of a slider, we change an image on the label.
sld = QtGui.QSlider(QtCore.Qt.Horizontal, self)
Here we create a horizontal QtGui.QSlider.
self.label = QtGui.QLabel(self)
self.label.setPixmap(QtGui.QPixmap('mute.png'))
We create a QtGui.QLabel widget. And set an initial mute image to it.
sld.valueChanged[int].connect(self.changeValue)
We connect the valueChanged[int] signal to the user defined changeValue() method.
if value == 0:
self.label.setPixmap(QtGui.QPixmap('mute.png'))
...
Based on the value of the slider, we set an image to the label. In the above code, we set a mute.png image to the label, if the slider value is equal to zero.
QtGui.QSlider widget
Figure: QtGui.QSlider widget

QtGui.QProgressBar

A progress bar is a widget that is used, when we process lengthy tasks. It is animated so that the user knows, that our task is progressing. The QtGui.QProgressBar widget provides a horizontal or vertical progress bar in PySide toolkit. The programmer can set the minimum and maximum values for the progress bar. The default values are 0, 99.
#!/usr/bin/python
# -*- coding: utf-8 -*-

"""
ZetCode PySide tutorial

This example shows a QtGui.QProgressBar widget.

author: Jan Bodnar
website: zetcode.com
last edited: August 2011
"""

import sys
from PySide import QtGui, QtCore

class Example(QtGui.QWidget):

def __init__(self):
super(Example, self).__init__()

self.initUI()

def initUI(self):

self.pbar = QtGui.QProgressBar(self)
self.pbar.setGeometry(30, 40, 200, 25)

self.btn = QtGui.QPushButton('Start', self)
self.btn.move(40, 80)
self.btn.clicked.connect(self.doAction)

self.timer = QtCore.QBasicTimer()
self.step = 0

self.setGeometry(300, 300, 280, 170)
self.setWindowTitle('QtGui.QProgressBar')
self.show()

def timerEvent(self, e):

if self.step >= 100:
self.timer.stop()
self.btn.setText('Finished')
return
self.step = self.step + 1
self.pbar.setValue(self.step)

def doAction(self):

if self.timer.isActive():
self.timer.stop()
self.btn.setText('Start')
else:
self.timer.start(100, self)
self.btn.setText('Stop')

def main():

app = QtGui.QApplication(sys.argv)
ex = Example()
sys.exit(app.exec_())


if __name__ == '__main__':
main()

In our example we have a horizontal progress bar and a push button. The push button starts and stops the progress bar.
self.pbar = QtGui.QProgressBar(self)
This is a QtGui.QProgressBar constructor.
self.timer = QtCore.QBasicTimer()
To activate the progress bar, we use the timer object.
self.timer.start(100, self)
To launch the timer events, we call the start() method. This method has two parameters. The timeout and the object, which will receive the events.
def timerEvent(self, e):

if self.step >= 100:
self.timer.stop()
self.btn.setText('Finished')
return
self.step = self.step + 1
self.pbar.setValue(self.step)
Each QtCore.QObject and its descendants have a timerEvent()event handler. In order to react to timer events, we reimplement the event handler. We update the self.step variable and set a new value for the progress bar widget.
def doAction(self):

if self.timer.isActive():
self.timer.stop()
self.btn.setText('Start')
else:
self.timer.start(100, self)
self.btn.setText('Stop')
Inside the doAction() method, we start and stop the timer.
QtGui.QProgressBar
Figure: QtGui.QProgressBar

QtGui.QCalendarWidget

The QtGui.QCalendarWidget provides a monthly based calendar widget. It allows a user to select a date in a simple and intuitive way.
#!/usr/bin/python
# -*- coding: utf-8 -*-

"""
ZetCode PySide tutorial

This example shows a QtGui.QCalendarWidget widget.

author: Jan Bodnar
website: zetcode.com
last edited: August 2011
"""

import sys
from PySide import QtGui, QtCore

class Example(QtGui.QWidget):

def __init__(self):
super(Example, self).__init__()

self.initUI()

def initUI(self):

cal = QtGui.QCalendarWidget(self)
cal.setGridVisible(True)
cal.move(20, 20)
cal.clicked[QtCore.QDate].connect(self.showDate)

self.lbl = QtGui.QLabel(self)
date = cal.selectedDate()
self.lbl.setText(date.toString())
self.lbl.move(130, 260)

self.setGeometry(300, 300, 350, 300)
self.setWindowTitle('Calendar')
self.show()

def showDate(self, date):
self.lbl.setText(date.toString())

def main():

app = QtGui.QApplication(sys.argv)
ex = Example()
sys.exit(app.exec_())


if __name__ == '__main__':
main()
The example has a calendar widget and a label widget. The currently selected date is displayed in the label widget.
self.cal = QtGui.QCalendarWidget(self)
We construct a calendar widget.
cal.clicked[QtCore.QDate].connect(self.showDate)
If we select a date from the widget, a clicked[QtCore.QDate] signal is emitted. We connect this signal to the user defined showDate() method.
def showDate(self, date):     
self.lbl.setText(date.toString())
We retrieve the selected date calling the selectedDate() method. Then we transform the date object into string and set it to the label widget.
QtGui.QCalendarWidget widget
Figure: QtGui.QCalendarWidget widget
In this part of the PySide tutorial, we covered several widgets.
Continue Reading

Dialogs in PySide

Dialogs in PySide

Dialog windows or dialogs are common in modern GUI applications. A dialog is defined as a conversation between two or more persons. In a computer application a dialog is a window which is used to "talk" to the application. A dialog is used to input data, modify data, change the application settings etc. Dialogs are important means of communication between a user and a computer program.

QtGui.QInputDialog

The QtGui.QInputDialog provides a simple convenience dialog to get a single value from a user. The input value can be a string, a number or an item from a list.
#!/usr/bin/python
# -*- coding: utf-8 -*-

"""
ZetCode PySide tutorial

In this example, we receive data from
a QtGui.QInputDialog dialog.

author: Jan Bodnar
website: zetcode.com
last edited: August 2011
"""

import sys
from PySide import QtGui

class Example(QtGui.QWidget):

def __init__(self):
super(Example, self).__init__()

self.initUI()

def initUI(self):

self.btn = QtGui.QPushButton('Dialog', self)
self.btn.move(20, 20)
self.btn.clicked.connect(self.showDialog)

self.le = QtGui.QLineEdit(self)
self.le.move(130, 22)

self.setGeometry(300, 300, 290, 150)
self.setWindowTitle('Input dialog')
self.show()

def showDialog(self):
text, ok = QtGui.QInputDialog.getText(self, 'Input Dialog',
'Enter your name:')

if ok:
self.le.setText(str(text))

def main():

app = QtGui.QApplication(sys.argv)
ex = Example()
sys.exit(app.exec_())


if __name__ == '__main__':
main()
The example has a button and a line edit widget. The button shows the input dialog for getting text values. The entered text will be displayed in the line edit widget.
text, ok = QtGui.QInputDialog.getText(self, 'Input Dialog', 
'Enter your name:')
This line displays the input dialog. The first string is a dialog title, the second one is a message within the dialog. The dialog returns the entered text and a boolean value. If we clicked the ok button, the boolean value would be true, false otherwise.
if ok:
self.le.setText(str(text))
The text that we have received from the dialog is set to the line edit widget.
Input Dialog
Figure: Input Dialog

QtGui.QColorDialog

The QtGui.QColorDialog provides a dialog widget for selecting colors.
#!/usr/bin/python
# -*- coding: utf-8 -*-

"""
ZetCode PySide tutorial

In this example, we select a color value
from the QtGui.QColorDialog and change the background
color of a QtGui.QFrame widget.

author: Jan Bodnar
website: zetcode.com
last edited: August 2011
"""

import sys
from PySide import QtGui

class Example(QtGui.QWidget):

def __init__(self):
super(Example, self).__init__()

self.initUI()

def initUI(self):

col = QtGui.QColor(0, 0, 0)

self.btn = QtGui.QPushButton('Dialog', self)
self.btn.move(20, 20)

self.btn.clicked.connect(self.showDialog)

self.frm = QtGui.QFrame(self)
self.frm.setStyleSheet("QWidget { background-color: %s }"
% col.name())
self.frm.setGeometry(130, 22, 100, 100)

self.setGeometry(300, 300, 250, 180)
self.setWindowTitle('Color dialog')
self.show()

def showDialog(self):

col = QtGui.QColorDialog.getColor()

if col.isValid():
self.frm.setStyleSheet("QWidget { background-color: %s }"
% col.name())

def main():

app = QtGui.QApplication(sys.argv)
ex = Example()
sys.exit(app.exec_())


if __name__ == '__main__':
main()

The application example shows a push button and a QtGui.QFrame. The widget background is set to black color. Using the QtGui.QColorDialog, we can change its background.
col = QtGui.QColor(0, 0, 0) 
This is an initial color of the QtGui.QFrame background.
col = QtGui.QColorDialog.getColor()
This line will pop up the QtGui.QColorDialog.
if col.isValid():
self.frm.setStyleSheet("QWidget { background-color: %s }"
% col.name())
We check if the color is valid. If we click on the cancel button, no valid color is returned. If the color is valid, we change the background color using style sheets.
Color dialog
Figure: Color dialog

QtGui.QFontDialog

The QtGui.QFontDialog is a dialog widget for selecting fonts.
#!/usr/bin/python
# -*- coding: utf-8 -*-

"""
ZetCode PySide tutorial

In this example, we select a font name
and change the font of a label.

author: Jan Bodnar
website: zetcode.com
last edited: August 2011
"""

import sys
from PySide import QtGui

class Example(QtGui.QWidget):

def __init__(self):
super(Example, self).__init__()

self.initUI()

def initUI(self):

vbox = QtGui.QVBoxLayout()

btn = QtGui.QPushButton('Dialog', self)
btn.setSizePolicy(QtGui.QSizePolicy.Fixed,
QtGui.QSizePolicy.Fixed)

btn.move(20, 20)

vbox.addWidget(btn)

btn.clicked.connect(self.showDialog)

self.lbl = QtGui.QLabel('Knowledge only matters', self)
self.lbl.move(130, 20)

vbox.addWidget(self.lbl)
self.setLayout(vbox)

self.setGeometry(300, 300, 250, 180)
self.setWindowTitle('Font dialog')
self.show()

def showDialog(self):

font, ok = QtGui.QFontDialog.getFont()
if ok:
self.lbl.setFont(font)

def main():

app = QtGui.QApplication(sys.argv)
ex = Example()
sys.exit(app.exec_())


if __name__ == '__main__':
main()
In our example, we have a button and a label. With QtGui.QFontDialog, we change the font of the label.
font, ok = QtGui.QFontDialog.getFont()
Here we pop up the font dialog. The getFont() method returns the font name and the ok parameter. It is equal to True if the user clicked OK; otherwise it is False.
if ok:
self.label.setFont(font)
If we clicked ok, the font of the label would be changed.

QtGui.QFileDialog

The QtGui.QFileDialog is a dialog that allows users to select files or directories. The files can be selected for both opening and saving.
#!/usr/bin/python
# -*- coding: utf-8 -*-

"""
ZetCode PySide tutorial

In this example, we select a file with a
QtGui.QFileDialog and display its contents
in a QtGui.QTextEdit.

author: Jan Bodnar
website: zetcode.com
last edited: October 2011
"""

import sys
from PySide import QtGui


class Example(QtGui.QMainWindow):

def __init__(self):
super(Example, self).__init__()

self.initUI()

def initUI(self):

self.textEdit = QtGui.QTextEdit()
self.setCentralWidget(self.textEdit)
self.statusBar()

openFile = QtGui.QAction(QtGui.QIcon('open.png'), 'Open', self)
openFile.setShortcut('Ctrl+O')
openFile.setStatusTip('Open new File')
openFile.triggered.connect(self.showDialog)

menubar = self.menuBar()
fileMenu = menubar.addMenu('&File')
fileMenu.addAction(openFile)

self.setGeometry(300, 300, 350, 300)
self.setWindowTitle('File dialog')
self.show()

def showDialog(self):

fname, _ = QtGui.QFileDialog.getOpenFileName(self, 'Open file',
'/home')

f = open(fname, 'r')

with f:
data = f.read()
self.textEdit.setText(data)


def main():

app = QtGui.QApplication(sys.argv)
ex = Example()
sys.exit(app.exec_())


if __name__ == '__main__':
main()
The example shows a menubar, centrally set text edit widget and a statusbar. The the menu item shows the QtGui.QFileDialog which is used to select a file. The contents of the file are loaded into the text edit widget.
class Example(QtGui.QMainWindow):

def __init__(self):
super(Example, self).__init__()
The example is based on the QtGui.QMainWindow widget. We can easily create a statusbar, toolbar and a central widget.
fname, _ = QtGui.QFileDialog.getOpenFileName(self, 'Open file',
'/home')
We pop up the QtGui.QFileDialog. The first string in the getOpenFileName() method is the caption. The second string specifies the dialog working directory. The method returns the selected file name and a filter. We are only interested in the file name.
f = open(fname, 'r')

with f:
data = f.read()
self.textEdit.setText(data)
The selected file name is read and the contents of the file are set to the text edit widget.
In this part of the PySide tutorial, we worked with dialogs.
Continue Reading

Events and Signals in PySide

Events and Signals in PySide

In this part of the PySide programming tutorial, we will explore events and signals occurring in applications.

Events

Events are an important part in any GUI program. Events are generated by users or by the system. When we call the application's exec_() method, the application enters the main loop. The main loop fetches events and sends them to the objects. PySide has a unique signal and slot mechanism.
All GUI applications are event-driven. An application reacts to different event types which are generated during its life. Events are generated mainly by the user of an application. But they can be generated by other means as well. e.g. Internet connection, window manager, timer. In the event model, there are three participants:
  • event source
  • event object
  • event target
The event source is the object whose state changes. It generates events. The event object (Event) encapsulates the state changes in the event source. The event target is the object that wants to be notified. Event source object delegates the task of handling an event to the event target.
When we call the application's exec_() method, the application enters the main loop. The main loop fetches events and sends them to the objects. Signals and slots are used for communication between objects. A signal is emitted when a particular event occurs. A slot can be any Python callable. A slot is called when a signal connected to it is emitted.

Signals & Slots

This is a simple example, demonstrating signals and slots in PySide.
#!/usr/bin/python
# -*- coding: utf-8 -*-

"""
ZetCode PySide tutorial

In this example, we connect a signal
of a QtGui.QSlider to a slot
of a QtGui.QLCDNumber.

author: Jan Bodnar
website: zetcode.com
last edited: August 2011
"""

import sys
from PySide import QtGui, QtCore

class Example(QtGui.QWidget):

def __init__(self):
super(Example, self).__init__()

self.initUI()

def initUI(self):

lcd = QtGui.QLCDNumber(self)
sld = QtGui.QSlider(QtCore.Qt.Horizontal, self)

vbox = QtGui.QVBoxLayout()
vbox.addWidget(lcd)
vbox.addWidget(sld)

self.setLayout(vbox)
sld.valueChanged.connect(lcd.display)

self.setGeometry(300, 300, 250, 150)
self.setWindowTitle('Signal & slot')
self.show()

def main():

app = QtGui.QApplication(sys.argv)
ex = Example()
sys.exit(app.exec_())


if __name__ == '__main__':
main()
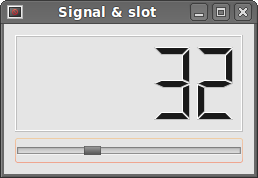
In our example, we display a QtGui.QLCDNumberand a QtGui.QSlider. We change the lcd number by dragging the slider knob.
sld.valueChanged.connect(lcd.display)
Here we connect a valueChanged signal of the slider to the display slot of the lcd number.
The sender is an object that sends a signal. The receiver is the object, that receives the signal. The slot is the method, that reacts to the signal.
Signals & slot
Figure: Signal & slot

Reimplementing event handler

Events in PySide are processed often by reimplementing event handlers.
#!/usr/bin/python
# -*- coding: utf-8 -*-

"""
ZetCode PySide tutorial

In this example, we reimplement an
event handler.

author: Jan Bodnar
website: zetcode.com
last edited: August 2011
"""

import sys
from PySide import QtGui, QtCore

class Example(QtGui.QWidget):

def __init__(self):
super(Example, self).__init__()

self.initUI()

def initUI(self):

self.setGeometry(300, 300, 250, 150)
self.setWindowTitle('Event handler')
self.show()

def keyPressEvent(self, e):

if e.key() == QtCore.Qt.Key_Escape:
self.close()

def main():

app = QtGui.QApplication(sys.argv)
ex = Example()
sys.exit(app.exec_())


if __name__ == '__main__':
main()

In our example, we reimplement the keyPressEvent() event handler.
def keyPressEvent(self, e):

if e.key() == QtCore.Qt.Key_Escape:
self.close()
If we click the escape button, the application terminates.

Event sender

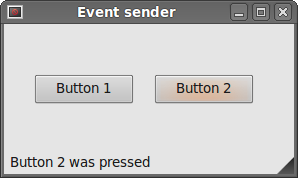
Sometimes it is convenient to know, which widget is the sender of a signal. For this, PySide has a sender()method.
#!/usr/bin/python
# -*- coding: utf-8 -*-

"""
ZetCode PySide tutorial

In this example, we determine the event sender
object.

author: Jan Bodnar
website: zetcode.com
last edited: August 2011
"""

import sys
from PySide import QtGui, QtCore

class Example(QtGui.QMainWindow):

def __init__(self):
super(Example, self).__init__()

self.initUI()

def initUI(self):

btn1 = QtGui.QPushButton("Button 1", self)
btn1.move(30, 50)

btn2 = QtGui.QPushButton("Button 2", self)
btn2.move(150, 50)

btn1.clicked.connect(self.buttonClicked)
btn2.clicked.connect(self.buttonClicked)

self.statusBar()

self.setGeometry(300, 300, 290, 150)
self.setWindowTitle('Event sender')
self.show()

def buttonClicked(self):

sender = self.sender()
self.statusBar().showMessage(sender.text() + ' was pressed')

def main():

app = QtGui.QApplication(sys.argv)
ex = Example()
sys.exit(app.exec_())


if __name__ == '__main__':
main()
We have two buttons in our example. In the buttonClicked() method we determine, which button we have clicked by calling the sender()method.
btn1.clicked.connect(self.buttonClicked)            
btn2.clicked.connect(self.buttonClicked)
Both buttons are connected to the same slot.
def buttonClicked(self):

sender = self.sender()
self.statusBar().showMessage(sender.text() + ' was pressed')
We detemine the signal source by calling the sender() method. In the statusbar of the application, we show the label of the button being pressed.
Event sender
Figure: Event sender

Emitting signals

Objects created from QtCore.QObject can emit signals. If we click on the button, a clicked signal is generated. In the following example we will see, how we can emit a custom signal.
#!/usr/bin/python
# -*- coding: utf-8 -*-

"""
ZetCode PySide tutorial

In this example, we show how to emit a
signal.

author: Jan Bodnar
website: zetcode.com
last edited: August 2011
"""

import sys
from PySide import QtGui, QtCore

class Communicate(QtCore.QObject):

closeApp = QtCore.Signal()

class Example(QtGui.QMainWindow):

def __init__(self):
super(Example, self).__init__()

self.initUI()

def initUI(self):

self.c = Communicate()
self.c.closeApp.connect(self.close)

self.setGeometry(300, 300, 290, 150)
self.setWindowTitle('Emit signal')
self.show()

def mousePressEvent(self, event):

self.c.closeApp.emit()

def main():

app = QtGui.QApplication(sys.argv)
ex = Example()
sys.exit(app.exec_())


if __name__ == '__main__':
main()

We create a new signal called closeApp. This signal is emitted, during a mouse press event. The signal is connected to the close() slot of the QtGui.QMainWindow.
class Communicate(QtCore.QObject):

closeApp = QtCore.Signal()
We create a class based on a QtCore.QObject. It creates a closeApp signal when instantiated.
self.c = Communicate()
self.c.closeApp.connect(self.close)
An instance of the Communicate class is created. We connect a close() slot of the QtGui.QMainWindowto the closeApp signal.
def mousePressEvent(self, event):

self.c.closeApp.emit()
When we click on the window with a mouse pointer, the closeApp signal is emitted.
In this part of the PySide tutorial, we have covered signals and slots.
Continue Reading