Layout management
In this chapter we will show how to lay out our widgets in windows or dialogs.When we design the GUI of our application, we decide what widgets we will use and how we will organize those widgets in the application. To organize our widgets, we use specialized non visible widgets called layout containers. In this chapter, we will mention absolute positioning,
FillLayout, RowLayout, GridLayout and FormLayout.Absolute positioning
In most cases, programmers should use layout managers. There are a few situations, where we can use absolute positioning. In absolute positioning, the programmer specifies the position and the size of each widget in pixels. The size and the position of a widget do not change, if you resize a window. Applications look different on various platforms, and what looks OK on Linux, might not look OK on Mac. Changing fonts in your application might spoil the layout. If you translate your application into another language, you must redo your layout. For all these issues, use the absolute positioning only when you have a reason to do so.package com.zetcode;In our example, we place two buttons on the window using absolute positioning.
import org.eclipse.swt.SWT;
import org.eclipse.swt.widgets.Button;
import org.eclipse.swt.widgets.Display;
import org.eclipse.swt.widgets.Shell;
/**
* ZetCode Java SWT tutorial
*
* In this program, we position two
* buttons using absolute coordinates
*
* @author jan bodnar
* website zetcode.com
* last modified June 2009
*/
public class SWTApp {
private Shell shell;
public SWTApp(Display display) {
shell = new Shell(display);
shell.setText("Absolute");
initUI();
shell.setSize(250, 200);
shell.setLocation(300, 300);
shell.open();
while (!shell.isDisposed()) {
if (!display.readAndDispatch()) {
display.sleep();
}
}
}
public void initUI() {
Button button1 = new Button(shell, SWT.PUSH);
button1.setText("Button");
button1.setBounds(20, 50, 80, 30);
Button button2 = new Button(shell, SWT.PUSH);
button2.setText("Button");
button2.setSize(80, 30);
button2.setLocation(50, 100);
}
public static void main(String[] args) {
Display display = new Display();
new SWTApp(display);
display.dispose();
}
}
button1.setBounds(20, 50, 80, 30);The
setBounds() method does two things. It positions the button at x=20, y=50 coordinates. It also sizes the button, width=80, height=30. button2.setSize(80, 30);Here we do the same in two steps. First we size the button using the
button2.setLocation(50, 100);
setSize() method. Then we locate it on the window using the setLocation() method. 
Figure: Absolute
FillLayout manager
TheFillLayout manager lays out widgets in a single row or column. It makes them to be the same size. package com.zetcode;In our example, we use this manager to display an image.
import org.eclipse.swt.SWT;
import org.eclipse.swt.graphics.Device;
import org.eclipse.swt.graphics.Image;
import org.eclipse.swt.graphics.Rectangle;
import org.eclipse.swt.layout.FillLayout;
import org.eclipse.swt.widgets.Display;
import org.eclipse.swt.widgets.Label;
import org.eclipse.swt.widgets.Shell;
/**
* ZetCode Java SWT tutorial
*
* This program demonstrates the FillLayout
* manager
*
* @author jan bodnar
* website zetcode.com
* last modified June 2009
*/
public class SWTApp {
private Shell shell;
private Image castle;
public SWTApp(Display display) {
shell = new Shell(display);
shell.setLayout(new FillLayout());
shell.setText("FillLayout");
Device dev = shell.getDisplay();
try {
    castle = new Image(dev, "redrock.png");
} catch(Exception e) {
    System.out.println("Cannot load image");
    System.out.println(e.getMessage());
    System.exit(1);
}
initUI();
Rectangle rect = castle.getBounds();
shell.setSize(rect.width, rect.height);
shell.setLocation(300, 300);
shell.open();
while (!shell.isDisposed()) {
if (!display.readAndDispatch()) {
display.sleep();
}
}
}
public void initUI() {
Label label = new Label(shell, SWT.IMAGE_PNG);
label.setImage(castle);
label.pack();
}
@Override
public void finalize() {
System.out.println("disposing");
castle.dispose();
}
public static void main(String[] args) {
Display display = new Display();
SWTApp app = new SWTApp(display);
app.finalize();
display.dispose();
}
}
shell.setLayout(new FillLayout());We set the
FillLayout to be the layout class for the shell. try {
castle = new Image(dev, "redrock.png");
} catch(Exception e) {
System.out.println("Cannot load image");
System.out.println(e.getMessage());
System.exit(1);
}
We load an image. Rectangle rect = castle.getBounds();We find out the size of the picture to resize the shell to exactly fit the image size.
shell.setSize(rect.width, rect.height);
Label label = new Label(shell, SWT.IMAGE_PNG);We set the image to the label widget.
label.setImage(castle);
label.pack();
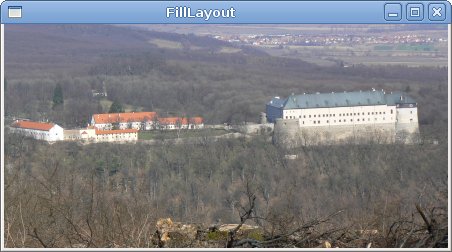
Figure: FillLayout
RowLayout
TheRowLayout manager places all widgets either in one row or in one column. package com.zetcode;In our example, we create a row of three buttons.
import org.eclipse.swt.SWT;
import org.eclipse.swt.layout.RowData;
import org.eclipse.swt.layout.RowLayout;
import org.eclipse.swt.widgets.Button;
import org.eclipse.swt.widgets.Display;
import org.eclipse.swt.widgets.Shell;
/**
* ZetCode Java SWT tutorial
*
* This program demonstrates the RowLayout
* manager
*
* @author jan bodnar
* website zetcode.com
* last modified June 2009
*/
public class SWTApp {
private Shell shell;
public SWTApp(Display display) {
shell = new Shell(display);
shell.setText("RowLayout");
initUI();
shell.pack();
shell.setLocation(300, 300);
shell.open();
while (!shell.isDisposed()) {
if (!display.readAndDispatch()) {
display.sleep();
}
}
}
public void initUI() {
RowLayout rowLayout = new RowLayout(SWT.HORIZONTAL);
rowLayout.marginTop = 10;
rowLayout.marginBottom = 10;
rowLayout.marginLeft = 5;
rowLayout.marginRight = 5;
rowLayout.spacing = 10;
shell.setLayout(rowLayout);
Button button1 = new Button(shell, SWT.PUSH);
button1.setText("Button");
button1.setLayoutData(new RowData(80, 30));
Button button2 = new Button(shell, SWT.PUSH);
button2.setText("Button");
button2.setLayoutData(new RowData(80, 30));
Button button3 = new Button(shell, SWT.PUSH);
button3.setText("Button");
button3.setLayoutData(new RowData(80, 30));
}
public static void main(String[] args) {
Display display = new Display();
new SWTApp(display);
display.dispose();
}
}
RowLayout rowLayout = new RowLayout(SWT.HORIZONTAL);We create a row.
rowLayout.marginTop = 10;We change the margins and the spacing for the row.
rowLayout.marginBottom = 10;
rowLayout.marginLeft = 5;
rowLayout.marginRight = 5;
rowLayout.spacing = 10;
shell.setLayout(rowLayout);We specify the row layout to be the layout for the shell.
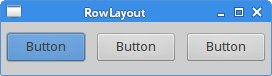
Figure: RowLayout manager
Calculator
In the following example, we use theGridLayout manager to create a skeleton of a calculator. The GridLayout manager puts its child widgets into a grid. package com.zetcode;We create a skeleton of a calculator with the GridLayout manager. We use three types of widgets. A text widget, a label widget and several buttons.
import org.eclipse.swt.SWT;
import org.eclipse.swt.layout.GridData;
import org.eclipse.swt.layout.GridLayout;
import org.eclipse.swt.widgets.Button;
import org.eclipse.swt.widgets.Display;
import org.eclipse.swt.widgets.Label;
import org.eclipse.swt.widgets.Shell;
import org.eclipse.swt.widgets.Text;
/**
* ZetCode Java SWT tutorial
*
* In this program, we use the GridLayout to
* create a calculator skeleton
*
* @author jan bodnar
* website zetcode.com
* last modified June 2009
*/
public class SWTApp {
private Shell shell;
public SWTApp(Display display) {
shell = new Shell(display);
shell.setText("Calculator");
initUI();
shell.pack();
shell.setLocation(300, 300);
shell.open();
while (!shell.isDisposed()) {
if (!display.readAndDispatch()) {
display.sleep();
}
}
}
public void initUI() {
GridLayout gl = new GridLayout(4, true);
gl.horizontalSpacing = 4;
gl.verticalSpacing = 4;
gl.marginBottom = 5;
gl.marginTop = 5;
shell.setLayout(gl);
String[] buttons = {
"Cls", "Bck", "", "Close", "7", "8", "9", "/", "4",
"5", "6", "*", "1", "2", "3", "-", "0", ".", "=", "+"
};
Text display = new Text(shell, SWT.SINGLE);
GridData gridData = new GridData();
gridData.horizontalSpan = 4;
gridData.horizontalAlignment = GridData.FILL;
display.setLayoutData(gridData);
for (int i = 0; i < buttons.length; i++) {
if (i == 2) {
Label lbl = new Label(shell, SWT.CENTER);
GridData gd = new GridData(SWT.FILL, SWT.FILL, false, false);
lbl.setLayoutData(gd);
} else {
Button btn = new Button(shell, SWT.PUSH);
btn.setText(buttons[i]);
GridData gd = new GridData(SWT.FILL, SWT.FILL, false, false);
gd.widthHint = 50;
gd.heightHint = 30;
btn.setLayoutData(gd);
}
}
}
public static void main(String[] args) {
Display display = new Display();
new SWTApp(display);
display.dispose();
}
}
GridLayout gl = new GridLayout(4, true);We create a
gl.horizontalSpacing = 4;
gl.verticalSpacing = 4;
gl.marginBottom = 5;
gl.marginTop = 5;
shell.setLayout(gl);
GridLayout with 4 columns. We provide some spacing and margins. Text display = new Text(shell, SWT.SINGLE);The
GridData gridData = new GridData();
gridData.horizontalSpan = 4;
gridData.horizontalAlignment = GridData.FILL;
display.setLayoutData(gridData);
GridData is the layout data object associated with GridLayout. We make the text widget span all four columns. Button btn = new Button(shell, SWT.PUSH);Inside the for loop, we create buttons and put them into the grid.
btn.setText(buttons[i]);
GridData gd = new GridData(SWT.FILL, SWT.FILL, false, false);
gd.widthHint = 50;
gd.heightHint = 30;
btn.setLayoutData(gd);
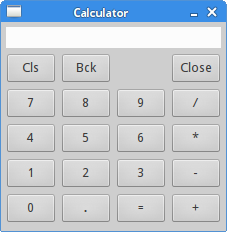
Figure: Calculator skeleton
Buttons
In the last example, we will create an example with theFormLayout manager. This manager controls the position and size of the children using two objects. FormData and FormAttachment. package com.zetcode;In this code example, we position two buttons in the bottom right corner of the window.
import org.eclipse.swt.SWT;
import org.eclipse.swt.layout.FormAttachment;
import org.eclipse.swt.layout.FormData;
import org.eclipse.swt.layout.FormLayout;
import org.eclipse.swt.widgets.Button;
import org.eclipse.swt.widgets.Display;
import org.eclipse.swt.widgets.Shell;
/**
* ZetCode Java SWT tutorial
*
* In this program, we position two buttons
* in the bottom right corner of the window
*
* @author jan bodnar
* website zetcode.com
* last modified June 2009
*/
public class SWTApp {
private Shell shell;
public SWTApp(Display display) {
shell = new Shell(display);
shell.setText("Buttons");
initUI();
shell.setSize(350, 200);
shell.setLocation(300, 300);
shell.open();
while (!shell.isDisposed()) {
if (!display.readAndDispatch()) {
display.sleep();
}
}
}
public void initUI() {
FormLayout layout = new FormLayout();
shell.setLayout(layout);
Button okButton = new Button(shell, SWT.PUSH);
okButton.setText("OK");

Button cancelButton = new Button(shell, SWT.PUSH);
cancelButton.setText("Cancel");
FormData cancelData = new FormData(80, 30);
cancelData.right = new FormAttachment(98);
cancelData.bottom = new FormAttachment(95);
cancelButton.setLayoutData(cancelData);
FormData okData = new FormData(80, 30);
okData.right = new FormAttachment(cancelButton, -5, SWT.LEFT);
okData.bottom = new FormAttachment(cancelButton, 0, SWT.BOTTOM);
okButton.setLayoutData(okData);
}
public static void main(String[] args) {
Display display = new Display();
new SWTApp(display);
display.dispose();
}
}
FormLayout layout = new FormLayout();
shell.setLayout(layout);
FormLayout manager is created. Button okButton = new Button(shell, SWT.PUSH);Two buttons are created.
okButton.setText("OK");
Button cancelButton = new Button(shell, SWT.PUSH);
cancelButton.setText("Cancel");
FormData cancelData = new FormData(80, 30);The cancel button's size is 80x30.
cancelData.right = new FormAttachment(98);The right side of the button is attached at 98% of the width of the window. The bottom side of the button is attached at 95% of the height of the window.
cancelData.bottom = new FormAttachment(95);
okData.right = new FormAttachment(cancelButton, -5, SWT.LEFT);The right side of the ok button goes 5px to the left of the cancel button. The bottom side of the ok button is aligned with the bottom of the cancel button.
okData.bottom = new FormAttachment(cancelButton, 0, SWT.BOTTOM);
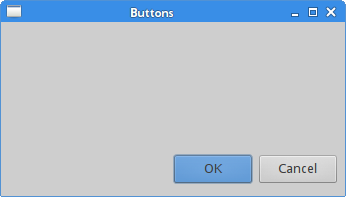
Figure: Buttons
In this part of the Java SWT tutorial, we talked about layout management of widgets. 
0 comments:
Post a Comment