Widgets in SWT
In this part of the Java SWT programming tutorial, we will introduce some SWT widgets.Widgets are basic building blocks of a GUI application. Think of widgets as parts of a lego. Over the years, several widgets became a standard in all toolkits on all OS platforms. For example a button, a check box or a scroll bar.
Label
ALabel widget shows text. package com.zetcode;The code example shows some lyrics on the window.
import org.eclipse.swt.SWT;
import org.eclipse.swt.graphics.Point;
import org.eclipse.swt.widgets.Display;
import org.eclipse.swt.widgets.Label;
import org.eclipse.swt.widgets.Shell;
/**
* ZetCode Java SWT tutorial
*
* This program uses the Label widget to
* show lyrics of a song
*
* @author jan bodnar
* website zetcode.com
* last modified June 2009
*/
public class SWTApp {
Shell shell;
String lyrics =
"And I know that he knows I'm unfaithful\n"+
"And it kills him inside\n"+
"To know that I am happy with some other guy\n"+
"I can see him dyin'\n"+
"\n"+
"I don't wanna do this anymore\n"+
"I don't wanna be the reason why\n"+
"Every time I walk out the door\n"+
"I see him die a little more inside\n"+
"I don't wanna hurt him anymore\n"+
"I don't wanna take away his life\n"+
"I don't wanna be...A murderer";
public SWTApp(Display display) {
shell = new Shell(display);
shell.setText("Unfaithful");
initUI();
shell.pack();
shell.setLocation(300, 300);
shell.open();
while (!shell.isDisposed()) {
if (!display.readAndDispatch()) {
display.sleep();
}
}
}
public void initUI() {
Label label = new Label(shell, SWT.LEFT);
label.setText(lyrics);
Point p = label.computeSize(SWT.DEFAULT, SWT.DEFAULT);
label.setBounds(5, 5, p.x+5, p.y+5);
}
public static void main(String[] args) {
Display display = new Display();
new SWTApp(display);
display.dispose();
}
}
String lyrics =We build a multiline text.
"And I know that he knows I'm unfaithful\n"+
"And it kills him inside\n"+
...
Label label = new Label(shell, SWT.LEFT);The
label.setText(lyrics);
Label widget is created. Text is left aligned. Point p = label.computeSize(SWT.DEFAULT, SWT.DEFAULT);We compute the size of the text in order put some space round the text.
label.setBounds(5, 5, p.x+5, p.y+5);
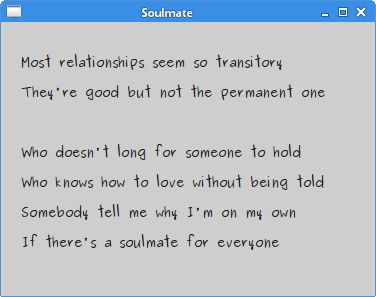
Figure: Label Widget
CheckButton
In SWT, check button is a special case of aButton. It is a widget, that has two states. On and Off. The On state is visualised by a check mark. It is used to denote some boolean property. package com.zetcode;We will display a title in the titlebar of the window, depending on the state of the check button.
import org.eclipse.swt.SWT;
import org.eclipse.swt.events.SelectionAdapter;
import org.eclipse.swt.events.SelectionEvent;
import org.eclipse.swt.widgets.Button;
import org.eclipse.swt.widgets.Display;
import org.eclipse.swt.widgets.Shell;
/**
* ZetCode Java SWT tutorial
*
* This program uses a check button
* widget to show/hide the title
* of the window
*
* @author jan bodnar
* website zetcode.com
* last modified June 2009
*/
public class SWTApp {
private Shell shell;
private Button cb;
public SWTApp(Display display) {
shell = new Shell(display);
shell.setText("Check button");
initUI();
shell.setSize(250, 200);
shell.setLocation(300, 300);
shell.open();
while (!shell.isDisposed()) {
if (!display.readAndDispatch()) {
display.sleep();
}
}
}
public void initUI() {
cb = new Button(shell, SWT.CHECK);
cb.setText("Show title");
cb.setSelection(true);
cb.setLocation(50, 50);
cb.pack();
cb.addSelectionListener(new SelectionAdapter() {
@Override
public void widgetSelected(SelectionEvent e) {
if (cb.getSelection()) {
    shell.setText("Check button");
} else {
    shell.setText("");
}
}
});
}
public static void main(String[] args) {
Display display = new Display();
new SWTApp(display);
display.dispose();
}
}
cb = new Button(shell, SWT.CHECK);
cb.setText("Show title");
CheckButton widget is created. cb.setSelection(true);The title is visible by default, so we check the check button by default.
if (cb.getSelection()) {
shell.setText("Check button");
} else {
shell.setText("");
}
Depending on the state of the CheckButton, we show or hide the title of the window. 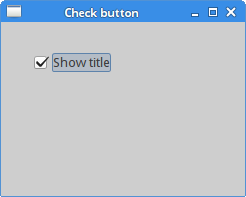
Figure: CheckButton
List widget
The next example introduces theList widget. This widget enables a user to select an option from a list of items. package com.zetcode;In this example, the selected item from the list widget is shown in the statusbar.
import org.eclipse.swt.SWT;
import org.eclipse.swt.layout.FormAttachment;
import org.eclipse.swt.layout.FormData;
import org.eclipse.swt.layout.FormLayout;
import org.eclipse.swt.widgets.Display;
import org.eclipse.swt.widgets.Event;
import org.eclipse.swt.widgets.Label;
import org.eclipse.swt.widgets.List;
import org.eclipse.swt.widgets.Listener;
import org.eclipse.swt.widgets.Shell;
/**
* ZetCode Java SWT tutorial
*
* This program shows the List
* widget
*
* @author jan bodnar
* website zetcode.com
* last modified June 2009
*/
public class SWTApp {
Shell shell;
public SWTApp(Display display) {
shell = new Shell(display);
shell.setText("List");
initUI();
shell.setSize(300, 250);
shell.setLocation(300, 300);
shell.open();
while (!shell.isDisposed()) {
if (!display.readAndDispatch()) {
display.sleep();
}
}
}
public void initUI() {
final Label status = new Label(shell, SWT.BORDER);
status.setText("Ready");
FormLayout layout = new FormLayout();
shell.setLayout(layout);
FormData labelData = new FormData();
labelData.left = new FormAttachment(0);
labelData.right = new FormAttachment(100);
labelData.bottom = new FormAttachment(100);
status.setLayoutData(labelData);
final List list = new List(shell, SWT.BORDER);
list.add("Aliens");
list.add("Capote");
list.add("Neverending story");
list.add("Starship troopers");
list.add("Exorcist");
list.add("Omen");
list.addListener(SWT.Selection, new Listener () {
    public void handleEvent (Event e) {
        String[] items = list.getSelection();
        status.setText(items[0]);
    }
});
FormData listData = new FormData();
listData.left = new FormAttachment(shell, 30, SWT.LEFT);
listData.top = new FormAttachment(shell, 30, SWT.TOP);
list.setLayoutData(listData);
}
public static void main(String[] args) {
Display display = new Display();
new SWTApp(display);
display.dispose();
}
}
final Label status = new Label(shell, SWT.BORDER);SWT library has no statusbar widget. We use a simple label for this. The label has a border.
status.setText("Ready");
FormLayout layout = new FormLayout();We use the
shell.setLayout(layout);
FormLayout widget to arrange our widgets on the window. FormData labelData = new FormData();This code will attach the status label to the bottom of the window. Where we usually see the statusbar.
labelData.left = new FormAttachment(0);
labelData.right = new FormAttachment(100);
labelData.bottom = new FormAttachment(100);
status.setLayoutData(labelData);
final List list = new List(shell, SWT.BORDER);The
List widget is created. list.add("Aliens");
list.add("Capote");
list.add("Neverending story");
list.add("Starship troopers");
list.add("Exorcist");
list.add("Omen");
It is filled with data. list.addListener(SWT.Selection, new Listener () {
public void handleEvent (Event e) {
String[] items = list.getSelection();
status.setText(items[0]);
}
});
We add a listener to the List widget. When we select an option, the handleEvet() method is executed. In this method, we set the selected text to the status label. FormData listData = new FormData();This code puts the
listData.left = new FormAttachment(shell, 30, SWT.LEFT);
listData.top = new FormAttachment(shell, 30, SWT.TOP);
list.setLayoutData(listData);
List widget at x = 30px, y = 30px. 
Figure: List widget
Slider
TheSlider is a widget, that lets the user graphically select a value by sliding a knob within a bounded interval. Our example will show a volume control. package com.zetcode;In the example above, we have
import org.eclipse.swt.SWT;
import org.eclipse.swt.graphics.Device;
import org.eclipse.swt.graphics.Image;
import org.eclipse.swt.widgets.Display;
import org.eclipse.swt.widgets.Event;
import org.eclipse.swt.widgets.Label;
import org.eclipse.swt.widgets.Listener;
import org.eclipse.swt.widgets.Shell;
import org.eclipse.swt.widgets.Slider;
/**
* ZetCode Java SWT tutorial
*
* In this program, we use the slider
* widget to create a volume control
*
* @author jan bodnar
* website zetcode.com
* last modified June 2009
*/
public class SWTApp {
private Shell shell;
private Image mute;
private Image min;
private Image med;
private Image max;
public SWTApp(Display display) {
shell = new Shell(display);
Device dev = shell.getDisplay();
try {
mute = new Image(dev, "mute.png");
min = new Image(dev, "min.png");
med = new Image(dev, "med.png");
max = new Image(dev, "max.png");
} catch(Exception e) {
System.out.println("Cannot load images");
System.out.println(e.getMessage());
System.exit(1);
}
shell.setText("Slider");
initUI();
shell.setSize(350, 200);
shell.setLocation(300, 300);
shell.open();
while (!shell.isDisposed()) {
if (!display.readAndDispatch()) {
display.sleep();
}
}
}
public void initUI() {
final Label label = new Label(shell, SWT.IMAGE_PNG);
label.setImage(mute);
label.pack();
label.setLocation(240, 30);
final Slider slider = new Slider(shell, SWT.HORIZONTAL);
slider.setMaximum(100);
slider.setBounds(30, 30, 180, 30);
slider.addListener (SWT.Selection, new Listener () {
public void handleEvent (Event e) {
int value = slider.getSelection();
if (value == 0) {
    label.setImage(mute);
    label.pack();
} else if (value > 0 && value <= 30) {
    label.setImage(min);
} else if (value > 30 && value < 80) {
    label.setImage(med);
} else {
    label.setImage(max);
}
}
});
}
@Override
public void finalize() {
    System.out.println("disposing");
    mute.dispose();
    med.dispose();
    min.dispose();
    max.dispose();
}
public static void main(String[] args) {
Display display = new Display();
SWTApp app = new SWTApp(display);
app.finalize();
display.dispose();
}
}
Slider and Image widgets. By dragging the knob of the slider we change the picture on the Label widget. final Slider slider = new Slider(shell, SWT.HORIZONTAL);Slider widget is created. Its maximum value is 100.
slider.setMaximum(100);
int value = slider.getSelection();Inside the listener object, we obtain the value of the slider widget.
if (value == 0) {
label.setImage(mute);
label.pack();
} else if (value > 0 && value <= 30) {
label.setImage(min);
} else if (value > 30 && value < 80) {
label.setImage(med);
} else {
label.setImage(max);
}
Depending on the obtained value, we change the picture in the label widget. @OverrideWe release the resources.
public void finalize() {
System.out.println("disposing");
mute.dispose();
med.dispose();
min.dispose();
max.dispose();
}
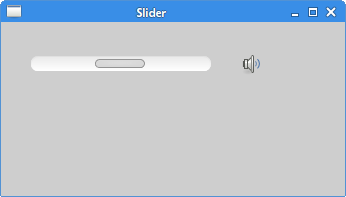
Figure: Slider widget
Combo widget
Combo is a widget that allows the user to choose from a drop down list of options.package com.zetcode;The example shows a combo box and a label. The combo box has a list of six options. These are the names of Linux Distros. The label widget shows the selected option from the combo box.
import org.eclipse.swt.SWT;
import org.eclipse.swt.events.SelectionAdapter;
import org.eclipse.swt.events.SelectionEvent;
import org.eclipse.swt.widgets.Combo;
import org.eclipse.swt.widgets.Display;
import org.eclipse.swt.widgets.Label;
import org.eclipse.swt.widgets.Shell;
/**
* ZetCode Java SWT tutorial
*
* In this program, we use the Combo
* widget to select an option.
* The selected option is shown in the
* Label widget.
*
* @author jan bodnar
* website zetcode.com
* last modified June 2009
*/
public class SWTApp {
Shell shell;
public SWTApp(Display display) {
shell = new Shell(display);
shell.setText("Combo");
initUI();
shell.setSize(300, 250);
shell.setLocation(300, 300);
shell.open();
while (!shell.isDisposed()) {
if (!display.readAndDispatch()) {
display.sleep();
}
}
}
public void initUI() {
final Label label = new Label(shell, SWT.LEFT);
label.setText("...");
label.setLocation(50, 100);
label.pack();
final Combo combo = new Combo(shell, SWT.DROP_DOWN);
combo.add("Ubuntu");
combo.add("Fedora");
combo.add("Mandriva");
combo.add("Red Hat");
combo.add("Mint");
combo.addSelectionListener(new SelectionAdapter() {
@Override
public void widgetSelected(SelectionEvent e) {
    label.setText(combo.getText());
    label.pack();
};
});
combo.setLocation(50, 30);
combo.pack();
}
public static void main(String[] args) {
Display display = new Display();
new SWTApp(display);
display.dispose();
}
}
final Combo combo = new Combo(shell, SWT.DROP_DOWN);
Combo widget is created. combo.add("Ubuntu");
combo.add("Fedora");
combo.add("Mandriva");
combo.add("Red Hat");
combo.add("Mint");
It is filled with data. @OverrideWe set the selected text to the label widget.
public void widgetSelected(SelectionEvent e) {
label.setText(combo.getText());
label.pack();
};
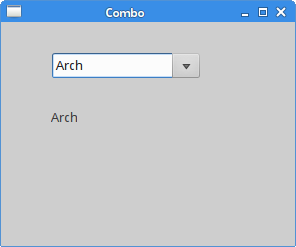
Figure: Combo widget
In this part of the Java SWT tutorial, we described some widgets of the SWT library. 
0 comments:
Post a Comment